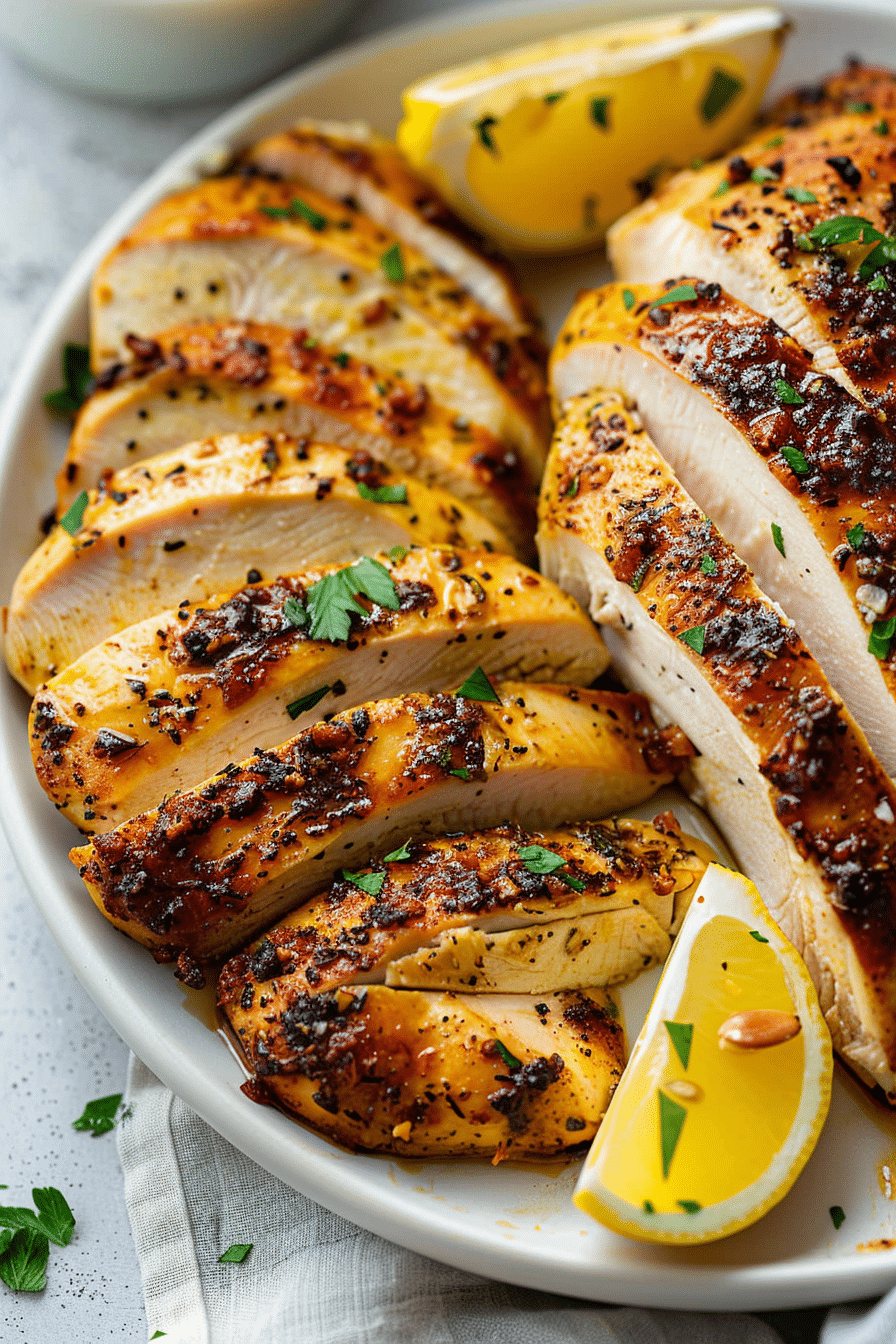
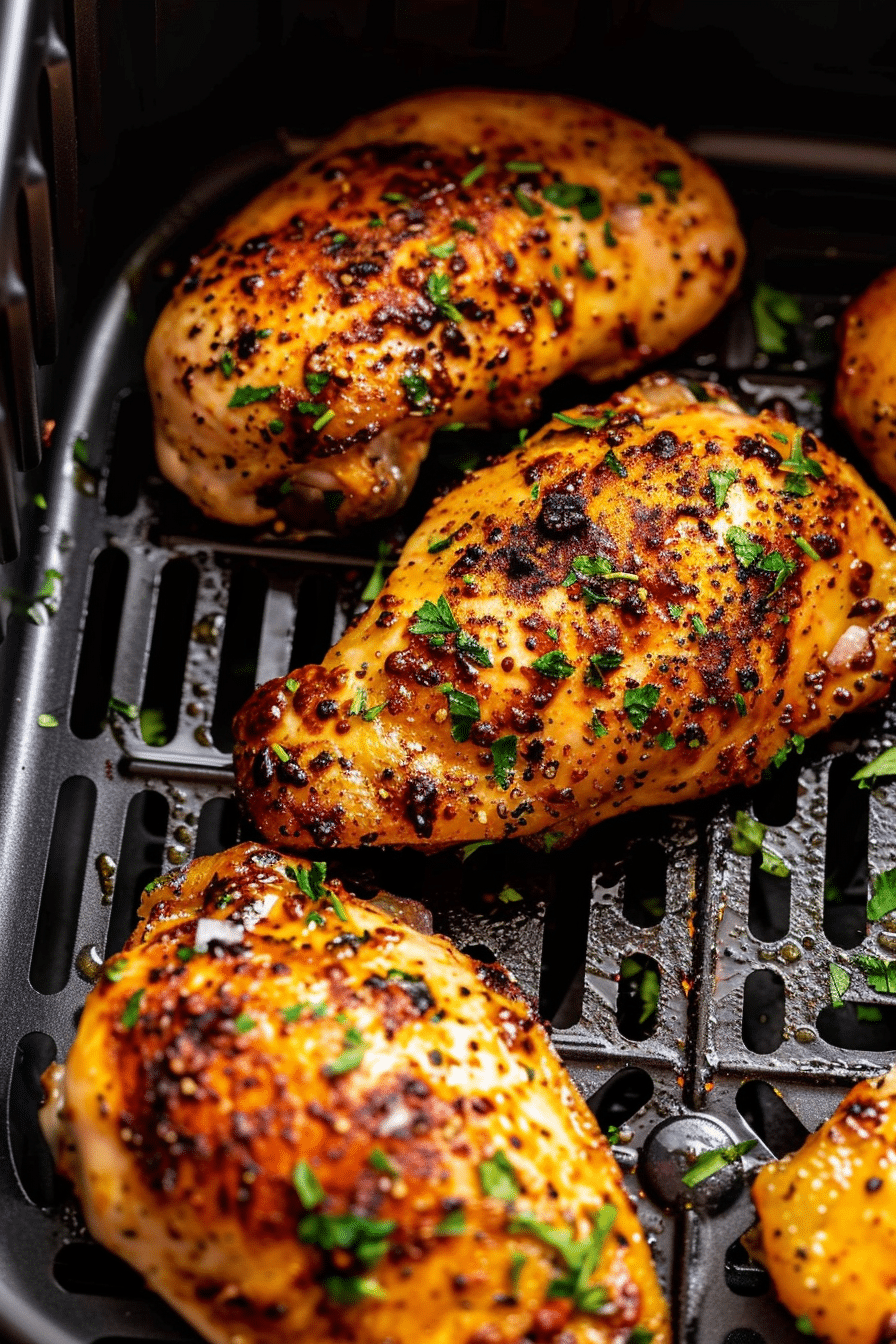
Let me tell you about the moment I cracked the code on perfectly juicy air fryer chicken breasts. I’m standing in my tiny Brooklyn kitchen at 6:47 PM on a Tuesday – and yes, I remember the exact time because Emma had soccer practice at 7:30 – staring at these beautiful organic chicken breasts I’d grabbed from the Union Market, wondering how I was gonna turn them into something my family would actually fight over instead of politely push around their plates.
If you’ve been following my [Air Fryer Chicken Recipes] collection, you know I’ve mastered everything from crispy wings to tender thighs, but chicken breasts? They kept coming out dry as cardboard, no matter what I tried. Jake kept joking that I could probably use them as hockey pucks for Tyler’s street hockey games. Not exactly the cooking win I was going for, you know what I’m saying?
But that Tuesday night changed everything. After some serious trial and error – and I mean serious, like three dinners that went straight to the bodega cat downstairs – I finally figured out the secret. Now these air fryer chicken breasts are so juicy and flavorful that even my Italian mother-in-law asks for the recipe. And coming from a woman who’s been making chicken cutlets since before I was born? That’s saying something.

Table of Contents
Why Chicken Breast Works So Well in the Air Fryer
Here’s the thing about air fryers that took me way too long to understand: they’re basically tiny convection ovens on steroids. That circulating hot air creates this incredible seal on the outside of the chicken while keeping all the juices locked inside – when you do it right. When you do it wrong? Well, let’s just say I’ve learned from plenty of mistakes.
The magic happens because of something called the Maillard reaction – fancy science talk for “that beautiful golden-brown crust that makes your mouth water.” Traditional baking in my shoebox oven takes forever and often leaves you with this weird rubbery texture on the outside. Pan-frying works, but then I’m dealing with oil splatter all over my already-cramped counters, and forget about it if I’m trying to cook for the whole family.
Air frying gives you that perfect crispy exterior in about 15 minutes, and the rapid heat circulation means the interior cooks evenly without drying out. Plus, cleanup is a breeze – something every Brooklyn parent with a microscopic kitchen can appreciate. If you’re just getting started with air fryer chicken techniques, mastering the basic breast is your foundation for everything else, from buffalo cauliflower to those crispy thighs everyone’s always raving about.
Essential Preparation Tips
Choosing the Right Cut
When I’m at the market, I’m looking for chicken breasts that are roughly the same thickness – around 6 to 8 ounces each works perfectly in most air fryers. I learned this the hard way when I tried to cook one massive breast alongside a tiny one. Guess what happened? The little guy turned into chicken jerky while the big one was still pink in the middle. Not my finest culinary moment.
Here’s what I’ve discovered works best: if your breasts are thicker than about an inch, pound them out a bit with a meat mallet. Don’t have one? I’ve used a rolling pin wrapped in plastic wrap more times than I care to admit. The goal is getting them to a uniform thickness so they cook evenly.
Fresh is always better than frozen if you’ve got the time, but I’m not gonna lie – sometimes you forget to defrost and dinner waits for no one. If you’re working with frozen, you’ll need to add about 5 extra minutes to the cooking time and make sure they’re completely thawed first.
Pre-Cooking Prep Secrets
This is where most people go wrong, and honestly, I was guilty of this for months. You cannot – I repeat, cannot – just throw a wet chicken breast into the air fryer and expect magic. The moisture on the surface prevents that beautiful browning we’re after.
First thing: pat those babies dry with paper towels. I’m talking bone dry, like you’re prepping them for a tanning session. Then let them sit on the counter for about 15 minutes to come to room temperature. I know, I know, we’re all in a rush, but trust me on this one. Cold chicken straight from the fridge cooks unevenly.
For seasoning, I’ve tried everything from complex spice blends to simple salt and pepper. What works best? A good coating of olive oil (not too much, just enough to help seasonings stick), followed by salt, pepper, garlic powder, and paprika. The paprika isn’t just for color – it helps with that gorgeous golden-brown finish that makes your kids actually excited about dinner.

Juicy Air Fryer Chicken Breast
Equipment
- 1 Air fryer 5.8-quart or larger recommended
Ingredients
4 boneless, skinless chicken breasts (6-8 oz each)
2 tablespoons olive oil
1 teaspoon salt
1/2 teaspoon black pepper
1 teaspoon garlic powder
1 teaspoon paprika
1/2 teaspoon onion powder (optional)
Instructions
Pat chicken breasts completely dry with paper towels and let sit at room temperature for 15 minutes.
Preheat air fryer to 400°F for 3 minutes.
Rub chicken breasts with olive oil, then season evenly with salt, pepper, garlic powder, paprika, and onion powder if using.
Place chicken in air fryer basket, leaving space between pieces. Don’t overcrowd.
Cook for 12 minutes, flipping once at the 6-minute mark.
Check internal temperature reaches 165°F in the thickest part.
Let rest for 5 minutes before slicing and serving.
Notes
Nutrition
Step-by-Step Cooking Process
Setting Up Your Air Fryer
Okay, here’s where I’m gonna be straight with you about the preheating debate. Some recipes say you don’t need to preheat an air fryer, but for chicken breasts? You absolutely do. Three minutes at 400°F is all it takes, and it makes the difference between “meh” chicken and “where has this been all my life” chicken.
I spray my basket with a light coating of avocado oil cooking spray – not the heavy stuff that gunks up over time. If you’re using parchment paper (and honestly, cleanup is easier if you do), make sure it’s perforated or poke some holes in it yourself. I learned this after watching a piece of parchment paper fly around my air fryer like a sad little tornado.
For arrangement, don’t overcrowd. I can fit two good-sized breasts in my Cosori 5.8-quart, but three gets cramped and they don’t cook evenly. If you’re feeding a crowd, cook in batches. The second batch stays hot enough while the first one rests.
During Cooking
Here’s my foolproof method: 400°F for 12 minutes, flipping once at the 6-minute mark. But – and this is important – every air fryer cooks a little differently. My Ninja Foodi runs about 25 degrees hotter than what I set it to, so I adjust accordingly.
The flip at 6 minutes isn’t optional. I set a timer because I’ve gotten distracted helping with homework and forgotten to flip more times than Jake needs to know about. When you flip, that’s your chance to check how things are looking. You should see some nice browning starting to happen.
Around the 10-minute mark, your kitchen is gonna start smelling incredible. That’s your cue that things are going right. If you’re not getting any aroma by 8 minutes, bump up the heat by 25 degrees for the remaining time.
Finishing Touches
The magic number for perfectly cooked chicken breast is 165°F internal temperature. I invested in a good instant-read thermometer after one too many guessing games ended in disaster. Insert it into the thickest part of the breast – if it reads 160°F, pull it out because it’ll continue cooking from residual heat.
Let the chicken rest for at least 5 minutes before slicing. I know it’s tempting to dig right in, but this resting time lets the juices redistribute. I usually cover mine with foil during this time, which also helps if you’re juggling getting the rest of dinner ready.
For an extra touch of restaurant-quality finish, brush with a little butter mixed with fresh herbs during the last minute of cooking. It’s not necessary, but it makes Tuesday night feel a little more special.
Pro Tips from My Kitchen
After hundreds of chicken breasts (and yes, I’m probably single-handedly keeping our local farm in business), here are the game-changers I wish someone had told me from the start:
Temperature matters more than time. I’ve cooked identical chicken breasts in different air fryer models, and the Instant Vortex Plus needs about 375°F while my trusty Cosori wants 400°F for the same results. Start with the recommended temperature and adjust based on what you’re seeing.
Don’t flip too early. I used to flip at 5 minutes because I was anxious, but waiting until 6 minutes gives you better browning on the first side. That initial sear is what locks in the juices.
The toothpick test works for doneness too. If the juices run clear when you poke the thickest part, you’re good to go. Pink juices mean it needs more time.
For batch cooking, I’ll sometimes cook 6-8 breasts on Sunday and use them throughout the week. They reheat beautifully in the air fryer at 350°F for just 3-4 minutes.
Serving and Storage
Serving Suggestions
These chicken breasts are basically a blank canvas for whatever your family’s in the mood for. Tyler loves them sliced over Caesar salad with extra parmesan. Emma goes crazy for them diced up in pasta with that jarred Alfredo sauce I pretend I don’t buy but totally do.
My go-to weeknight move is serving them alongside roasted vegetables (also from the air fryer – efficiency, people!) and some rice or quinoa. The chicken pairs beautifully with everything from simple steamed broccoli to fancy roasted asparagus when I’m feeling ambitious.
For something more special, try slicing them and layering over arugula with cherry tomatoes, fresh mozzarella, and a drizzle of balsamic glaze. It looks way fancier than the 20 minutes it actually took to put together.
Storage and Reheating
Leftover chicken breasts will keep in the fridge for 3-4 days, and here’s the key: store them whole if possible. Sliced chicken dries out faster, so I try to slice only what I need for each meal.
For reheating, the air fryer wins again. Three minutes at 350°F brings them back to life without that microwave rubber texture. If they seem a little dry, brush them with a tiny bit of chicken broth before reheating.
You can freeze cooked chicken breasts for up to 3 months, but honestly, they never last that long in my house. When I do freeze them, I wrap each breast individually in plastic wrap, then put them all in a freezer bag. Thaw overnight in the fridge and reheat as usual.

Variations to Try
Once you’ve mastered the basic technique, the flavor possibilities are endless. I’ve had great success with lemon herb (fresh thyme, rosemary, and lemon zest), cajun spiced (careful with the heat level if you’ve got kids), and even a simple teriyaki glaze brushed on during the last 2 minutes of cooking.
For a Mediterranean twist, stuff the chicken breasts with spinach and feta before cooking – just butterfly them, add the filling, and secure with toothpicks. Add about 3 extra minutes to the cooking time.
My latest obsession is a honey mustard coating made with Dijon, honey, and a splash of apple cider vinegar. Brush it on during the last 3 minutes of cooking for a beautiful glaze that makes even my skeptical teenagers ask for seconds.
One variation that didn’t work? Trying to bread them like traditional fried chicken. The breading just fell off and made a mess. If you want that crispy coating, you need a different technique entirely – something for another article maybe.
The Bottom Line
After all my trials and errors – and trust me, there were plenty of both – perfectly juicy air fryer chicken breast comes down to three things: proper prep, the right temperature, and not overthinking it. What started as my weeknight dinner salvation has become one of my most requested recipes, and honestly, I’m not even a little surprised.
These chicken breasts have saved more Tuesday night dinners than I can count, impressed more in-laws than any fancy dessert, and proven to my skeptical Brooklyn neighbors that yes, air fryers can actually cook real food that real families want to eat.
So grab those chicken breasts from wherever you shop – whether it’s the fancy organic ones from Union Market or the family pack from your regular grocery store – and give this method a try. Your family might just start asking what’s for dinner with actual excitement instead of that resigned “oh, okay” we parents know all too well.
Frequently Asked Questions
Can I cook this from frozen?
You need to thaw completely first – I’ve tried cooking from frozen and the outside overcooks before the inside is done. If you forgot to defrost, run the breasts under cool water for 20-30 minutes. It’s faster than you think, and way better than risking uneven cooking.
Why is mine not getting crispy?
Nine times out of ten, it’s because the chicken wasn’t dried properly before seasoning, or you’re overcrowding the basket. Pat those breasts completely dry, give them room to breathe, and make sure your air fryer is properly preheated. Also check that you’re not using too much oil – just a light coating.
Can I double this recipe?
You can, but cook in batches for best results. Overcrowding leads to steaming instead of air frying, and nobody wants steamed chicken breast. Cook the first batch, let it rest under foil, then cook the second. The first batch stays plenty warm while the second finishes.
What if I don’t have a meat thermometer?
The toothpick method works – poke the thickest part and check if the juices run clear. You can also make a small cut in the thickest part to check that it’s white throughout with no pink areas. Once you get the hang of timing with your specific air fryer, you’ll be able to tell just by look and feel.
How do I prevent my chicken from drying out?
Don’t skip the oil – it helps create that moisture-sealing crust. Don’t overcook – 165°F internal temp is your target, not 180°F. And always let it rest after cooking so the juices can redistribute. Also, room temperature chicken cooks more evenly than cold chicken straight from the fridge.
Is this healthier than pan-frying?
You’re using way less oil than traditional pan-frying, which cuts down on calories and fat. Plus, any excess fat drips away from the food instead of sitting in the pan. It’s not deep-fried, but you still get that crispy exterior texture. Win-win for busy families trying to eat a little healthier.
Can I make this ahead?
You can season the chicken up to 24 hours ahead and keep it covered in the fridge – actually improves the flavor. But for best texture, cook it fresh. If you need to prep ahead for the week, cook it all on Sunday and reheat portions as needed. Just don’t expect the same crispy exterior after reheating.

