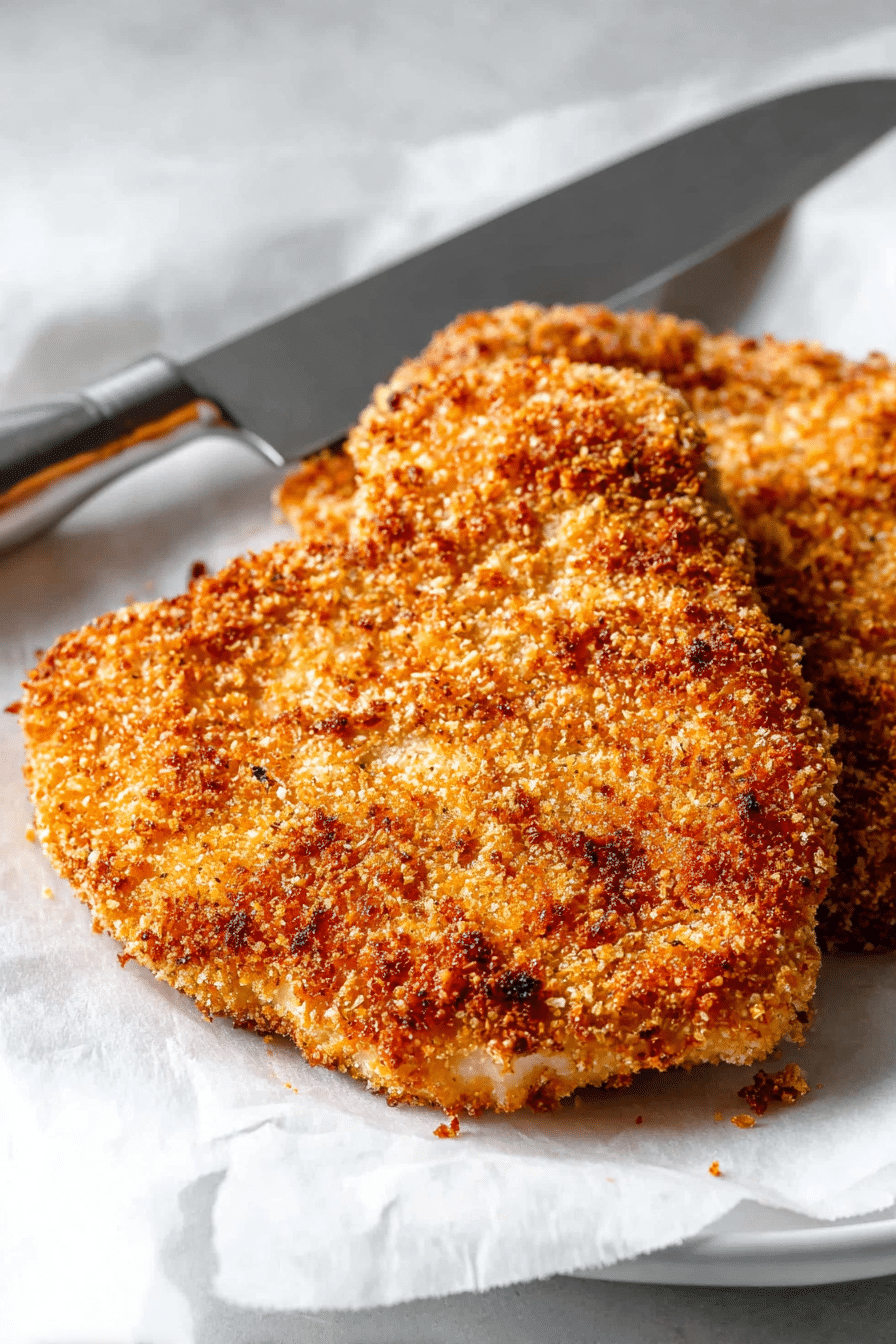
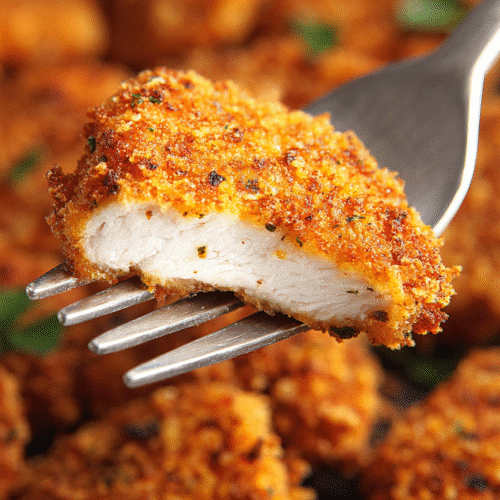
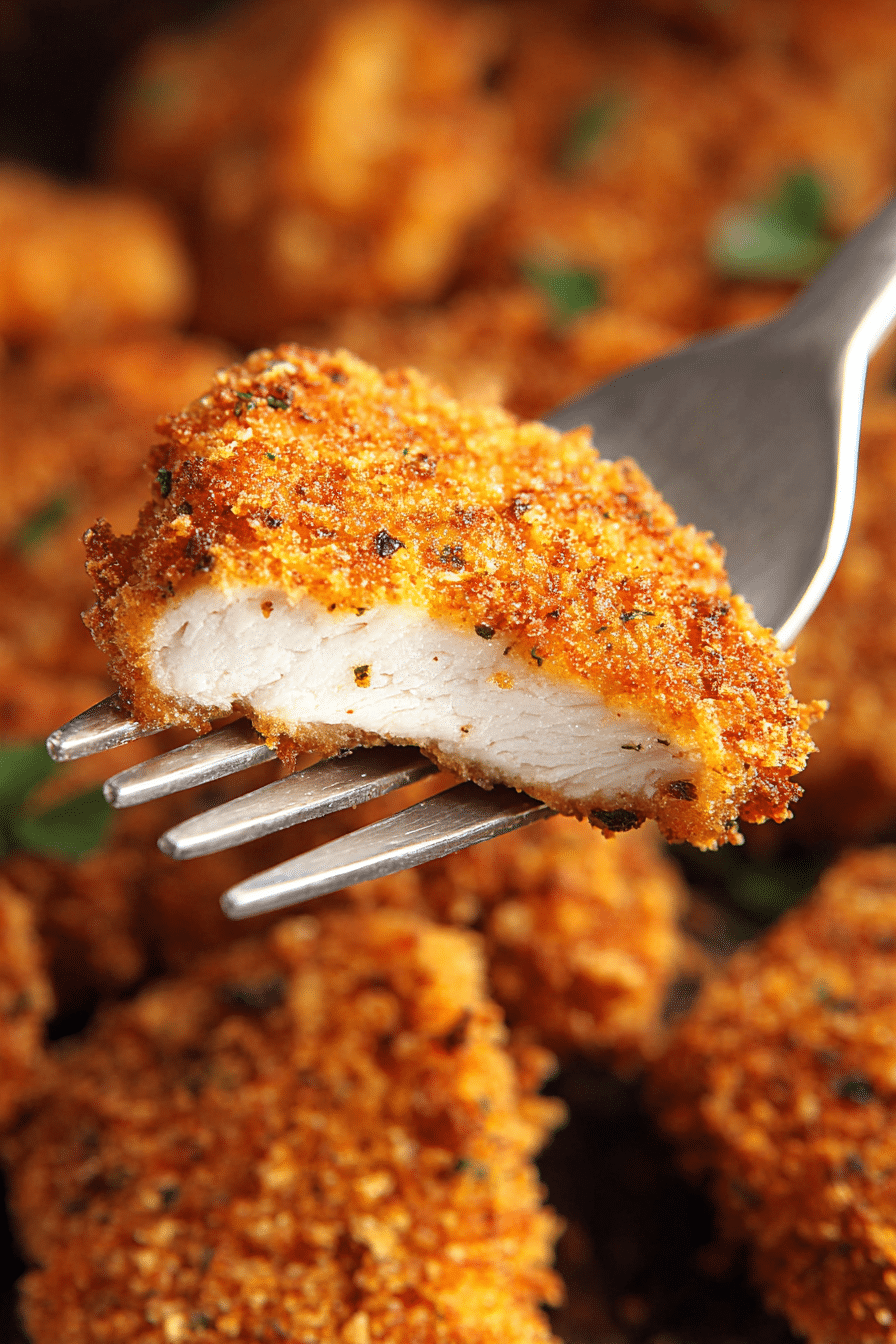
Crispy panko-crusted air fryer chicken transforms ordinary chicken breasts into golden, restaurant-quality cutlets with an incredibly crunchy coating that stays crispy for hours. After testing dozens of breading techniques and dealing with more soggy, fallen-off coatings than I care to admit, I finally cracked the code to panko perfection that works every single time.
My [Air Fryer Chicken Recipes] have become the backbone of our family’s weekly meal rotation, but this panko-crusted version is hands-down the most requested dish in our house. Emma literally squealed when I told her I was making “the crunchy chicken” for dinner last night, and even my texture-sensitive nephew Michael – who usually picks off every bit of breading – demolished two pieces without complaint.
What you’re about to learn isn’t just another coating recipe. This is a complete system for achieving that perfect panko crust that photographers dream about – golden, textured, and so crispy it practically shatters when you bite into it. Plus, I’ll share the troubleshooting tips that took me months to figure out, so you can skip straight to panko perfection.

Table of Contents
Why Crispy Panko-Crusted Air Fryer Chicken Works So Well
The difference between regular breadcrumbs and panko isn’t just marketing hype – it’s pure food science that makes all the difference in your air fryer. Panko breadcrumbs are made from crustless bread that’s processed into larger, airier flakes with an irregular shape that creates maximum surface area for browning.
When hot air circulates around these larger flakes in your air fryer, each individual piece gets crispy instead of just forming a dense coating. Regular breadcrumbs create what I call “the cardboard effect” – they pack together too tightly and steam instead of crisp. According to USDA food safety guidelines, the key to safe, delicious chicken is reaching 165°F internal temperature while maintaining moisture, and panko’s superior insulation properties help achieve exactly that.
Here’s what changed my panko game completely: I started treating the coating process like building layers of armor instead of just dunking chicken in crumbs. Each step has a specific purpose, and skipping or rushing any part guarantees mediocre results. Trust me, I learned this the hard way during what Jake now calls “The Great Coating Disaster of 2023.”

Crispy Panko-Crusted Air Fryer Chicken
Equipment
- Air fryer (5-6 quart capacity)
- Instant-read thermometer
- Wire cooling rack
- 3 shallow dishes (for breading station)
- Meat mallet (for pounding chicken)
Ingredients
For the Chicken:
4 boneless, skinless chicken breasts (about 1.5 lbs)
For the Flour Mixture:
½ cup all-purpose flour
1 teaspoon garlic powder
½ teaspoon onion powder
½ teaspoon paprika
½ teaspoon salt
¼ teaspoon black pepper
For the Liquid Mixture:
1 large egg, beaten
2 tablespoons milk
1 tablespoon seasoned flour
For the Panko Mixture:
1½ cups panko breadcrumbs
½ teaspoon dried thyme
½ teaspoon dried oregano
½ teaspoon garlic powder
½ teaspoon salt
¼ teaspoon cayenne pepper (optional)
Cooking oil spray
Instructions
Remove chicken from refrigerator 20 minutes before cooking. Pat completely dry and pound to ¼ inch thickness.
Set up breading station with three shallow dishes containing flour mixture, liquid mixture, and panko mixture respectively.
Coat each chicken piece: dredge in flour, dip in liquid mixture, then press firmly into panko mixture.
Place coated chicken on wire rack and let rest 15 minutes while air fryer preheats to 375°F.
Lightly spray air fryer basket with oil. Place chicken without overcrowding, spray tops with oil.
Cook 6-8 minutes, flip carefully, spray again, cook 6-8 minutes more until internal temperature reaches 165°F.
Transfer to wire rack and rest 5 minutes before serving.
Notes
- Don’t overcrowd the air fryer basket – cook in batches if necessary
- Cooking time varies with thickness – use meat thermometer for accuracy
- For gluten-free version, use GF flour and GF panko, reduce cooking time by 30 seconds per side
- Leftover chicken keeps 4 days refrigerated and reheats well in air fryer
- Can be frozen after coating for up to 3 months
Nutrition
Essential Crispy Panko-Crusted Air Fryer Chicken Techniques
Understanding the Three-Step Process
The flour-liquid-panko sequence isn’t arbitrary – it’s engineered for maximum adhesion and crispiness. The flour creates a dry base that grabs onto the chicken, the liquid (milk or egg) acts as glue, and the panko provides the textural fireworks. But here’s where most people mess up: they don’t season each layer independently.
I season my flour with garlic powder, onion powder, and paprika because these flavors need direct contact with the chicken to penetrate. The panko gets a different seasoning blend focused on herbs and spices that bloom under high heat – thyme, oregano, and a touch of cayenne for complexity.
Temperature control during coating is crucial and something I wish someone had told me earlier. Room temperature chicken coats more evenly than cold chicken, but you can’t let it sit out too long for food safety. I take my chicken out exactly 20 minutes before cooking – enough time to lose the chill but not long enough to enter the danger zone.
The Panko Selection Game-Changer
Not all panko is created equal, and this discovery revolutionized my results. Japanese-style panko (the original) creates the crispiest coating because of its larger, more irregular flake size. American-style panko often has smaller, more uniform pieces that don’t crisp as dramatically.
I’ve tested every brand available at our local grocery stores, and here’s what I’ve found: Kikkoman and 4C produce the most dramatic crunch, while store brands often disappoint. If you’re gluten-free, Ian’s and Kinnikinnick work beautifully, though they require about 30 seconds less cooking time.
Fresh panko versus old makes a shocking difference. Stale panko creates a coating that tastes like cardboard and browns unevenly. I keep mine in an airtight container and replace it every two months – the improved texture is worth the small extra cost.
Step-by-Step Coating Mastery
Setting Up Your Breading Station
Organization prevents the dreaded “chicken hand” syndrome where you end up with coating glued to your fingers instead of the chicken. I arrange three shallow dishes in assembly-line order: seasoned flour, liquid, seasoned panko. A fourth plate holds the coated pieces before they go into the air fryer.
The liquid choice affects more than just taste – it impacts coating adhesion and final texture. Milk creates a more tender coating but slightly less adhesion. Beaten eggs provide superior sticking power but can make the coating slightly denser. For the absolute crispiest results, I use a combination: two tablespoons of milk whisked into one beaten egg.
Pro tip that changed everything: I add one tablespoon of the seasoned flour to my liquid mixture. This creates tiny pockets of extra crunch throughout the coating – something I discovered accidentally when flour spilled into my egg wash during a particularly chaotic dinner prep.
The Coating Technique That Actually Works
Pat your chicken completely dry with paper towels – and I mean completely. Any surface moisture creates steam pockets that prevent proper browning. I sometimes let pounded chicken rest on a wire rack for 10 minutes to air-dry after patting it down.
For the flour step, I don’t just dip and flip. I press the chicken into the flour, flip it, and press again, ensuring every surface gets coated. Shake off excess thoroughly – too much flour creates a gummy layer between the chicken and panko.
The liquid step requires restraint. Dip quickly, flip, dip again, then hold the chicken up for about 5 seconds to let excess drip off. Too much liquid makes the panko soggy; too little means poor adhesion. You want a thin, even coating that looks slightly glossy but not dripping.
Panko Application Secrets
Here’s the technique that elevated my panko game: instead of just pressing the chicken into the crumbs, I grab handfuls of panko and pack it onto the chicken like I’m making a snowball. This creates a thicker, more textured coating that stays put during cooking. Food science research shows that authentic panko’s flaky, irregular shape provides better adhesion and stays crispier longer than regular breadcrumbs because it absorbs less oil and doesn’t pack together during cooking.
Pay special attention to the edges and any thin areas – these spots often lose their coating first. I sometimes do a double-panko step for particularly thin pieces, giving them a second light coating after the first layer adheres.
Let coated chicken rest for 10-15 minutes before cooking. This resting period allows the coating to set up and dramatically reduces the chance of it falling off during cooking. I usually prep all my pieces, then clean up my breading station while they rest.

Air Fryer Cooking Optimization
Temperature and Timing Precision
After testing temperatures from 350°F to 400°F, I’ve found that 375°F delivers the perfect balance of crispy exterior and juicy interior. Lower temperatures don’t crisp the panko enough; higher temperatures can burn the coating before the chicken cooks through.
Timing depends entirely on thickness, and this is where so many recipes fail by giving blanket cook times. Quarter-inch cutlets need about 6-7 minutes per side, while thicker pieces require 8-10 minutes per side. I always use my instant-read thermometer to check for 165°F internal temperature rather than relying on time alone.
The flip is crucial and requires a gentle touch. I use tongs and support the chicken from underneath to prevent the coating from tearing. If pieces seem to be browning too quickly on one side, I’ll flip them a minute early and adjust the remaining time accordingly.
Basket Management and Air Circulation
Overcrowding kills crispiness faster than anything else, according to Consumer Reports’ air fryer testing data. I leave at least half an inch between pieces and never stack them. For family meals, I cook in batches and keep finished pieces warm in a 200°F oven.
I lightly spray my air fryer basket with cooking oil before adding chicken to prevent sticking. Some people skip this step, but I’ve had too many perfectly coated pieces lose their bottoms to the basket to risk it anymore.
Spray the tops of your coated chicken lightly with cooking oil before and after flipping. This isn’t optional – the oil helps the panko brown evenly and creates that signature golden color. I use an oil sprayer filled with avocado oil for the best results.
Troubleshooting Common Panko Problems
When Coating Falls Off
This was my biggest frustration until I identified the main culprits. Wet chicken is problem number one – always pat completely dry. Skipping the resting period is number two. Problem number three is using old, stale panko that doesn’t adhere properly.
Temperature shock can also cause coating loss. I learned to let my air fryer preheat completely before adding chicken, rather than starting with a cold basket. The gradual heat increase helps the coating set before the intense crisping begins.
If you notice coating starting to lift during cooking, resist the urge to press it down with your tongs. Instead, give it a light spray of oil and let the hot air circulation do its work. Pressing usually makes the problem worse.
Achieving Even Browning
Uneven browning usually indicates air circulation problems or thickness variations in your chicken. I’ve learned to pound chicken to a very consistent thickness – about ¼ inch throughout. Even slight variations create hot spots and uneven cooking.
Some air fryer models have hot spots, and learning yours makes a huge difference. My Cosori runs hotter on the left side, so I position thicker pieces there and rotate halfway through cooking if needed.
Color development happens quickly in the final few minutes of cooking. If your panko looks pale with 2-3 minutes remaining, increase the temperature by 25 degrees for the final phase. Just watch carefully to prevent burning.
Serving and Storage Solutions
Keeping Crispiness After Cooking
The secret to maintaining that just-cooked crunch is proper resting technique. I place finished chicken on a wire rack set over a baking sheet, never on a solid surface where steam can make the bottom soggy. This method keeps chicken crispy for up to 30 minutes.
For longer holding, your oven becomes your best friend. Set it to 200°F and place the wire rack setup inside. This gentle heat keeps everything warm while maintaining the crispy coating without continuing to cook the chicken.
Serving immediately isn’t always practical with family schedules, but I’ve found that panko-crusted chicken reheats better than any other coating. The key is using your air fryer for reheating – just 2-3 minutes at 350°F brings back most of the original crispiness.
Make-Ahead and Meal Prep Strategies
Coated chicken can be prepared up to 4 hours ahead and refrigerated before cooking. Any longer and the coating starts to get soggy from the chicken’s natural moisture. For longer meal prep, I freeze the coated pieces on a baking sheet, then transfer to freezer bags once solid.
Cooking from frozen adds about 5-7 minutes to the total cook time. Don’t thaw first – go straight from freezer to air fryer for the best texture. The coating actually stays crispier when cooked from frozen because there’s less moisture migration.
Leftover panko chicken transforms into incredible chicken salad, wraps, and sandwiches. The coating holds up surprisingly well when stored properly in the refrigerator for up to 4 days. I actually prefer day-old panko chicken for chicken Caesar salads because the flavors have had time to meld.
Creative Variations and Flavor Profiles
International Seasoning Blends
Italian-style panko chicken gets oregano, basil, and Parmesan cheese mixed into the panko, plus a touch of garlic powder in the flour. This version is incredible over pasta or in a caprese-style sandwich with fresh mozzarella and tomatoes.
For Asian-inspired flavors, I add sesame seeds and five-spice powder to the panko, with ginger powder in the flour mixture. Serve with a soy-ginger dipping sauce and steamed vegetables for a complete meal that feels restaurant-special.
Mexican-spiced panko incorporates cumin, chili powder, and smoked paprika. I sometimes add crushed tortilla chips to the panko for extra crunch and corn flavor. This version is perfect for chicken tacos or served over a Mexican-style salad.
Dietary Adaptations That Actually Work
Gluten-free panko works beautifully with one adjustment – reduce cooking time by about 30 seconds per side since GF panko browns faster. I’ve had great success with both store-bought and homemade versions using gluten-free bread.
For dairy-free coating, replace milk with unsweetened almond milk or oat milk. The results are nearly identical, and even Jake’s lactose-intolerant sister couldn’t tell the difference when I served it at our last family dinner.
Low-carb versions using crushed pork rinds instead of panko create an incredibly crispy coating with zero carbs. The flavor is more intense, so I reduce other seasonings slightly. This version has become Tyler’s new obsession since he started paying attention to his soccer nutrition.
Conclusion
Perfect panko-crusted air fryer chicken comes down to understanding the science behind the coating and respecting each step of the process. When you treat the flour, liquid, and panko as individual components with specific roles, rather than just steps to rush through, the results are transformative.
The difference between good and absolutely incredible panko chicken lies in the details: room temperature chicken, proper seasoning distribution, adequate resting time, and precise temperature control. Master these elements, and you’ll have restaurant-quality results that make weeknight dinners feel special and weekend meals absolutely memorable.
Frequently Asked Questions
Why does my panko coating taste bland even though I season it?
You’re probably not seasoning each layer independently. The flour layer needs seasoning because it’s in direct contact with the chicken, and the panko needs different seasonings that bloom under high heat. Don’t just season one component – season everything.
Can I use regular breadcrumbs instead of panko?
Regular breadcrumbs won’t give you the same dramatic crunch because they’re too fine and dense. If that’s all you have, try mixing them with some crushed cornflakes or crackers to add texture, but the results won’t be quite the same.
How do I prevent the coating from burning before the chicken cooks through?
Your chicken is probably too thick. Pound it to ¼ inch thickness for even cooking, or lower the temperature to 350°F and cook longer. Thick chicken always causes this problem in air fryers.
Why does my coating fall off during cooking?
The most common causes are wet chicken, skipping the resting period, or using stale panko. Make sure your chicken is completely dry, let coated pieces rest 10-15 minutes before cooking, and use fresh panko for the best adhesion.
Can I make this ahead for meal prep?
Yes, but with limits. Coated chicken can be refrigerated up to 4 hours before cooking, or frozen for up to 3 months. For longer meal prep, I recommend cooking completely and reheating in the air fryer for 2-3 minutes.
What’s the best way to reheat leftover panko chicken?
Your air fryer is the secret weapon here. Reheat at 350°F for 2-3 minutes and the coating comes back almost as crispy as when first cooked. Never use the microwave – it turns the coating soggy and rubbery.
How thick should I pound my chicken for the best results?
Quarter-inch thickness throughout is the sweet spot. Any thicker and the coating burns before the center cooks; any thinner and you risk overcooking the meat. Consistent thickness is more important than the exact measurement.


Just what I was looking for. Thank You
lovely recipe