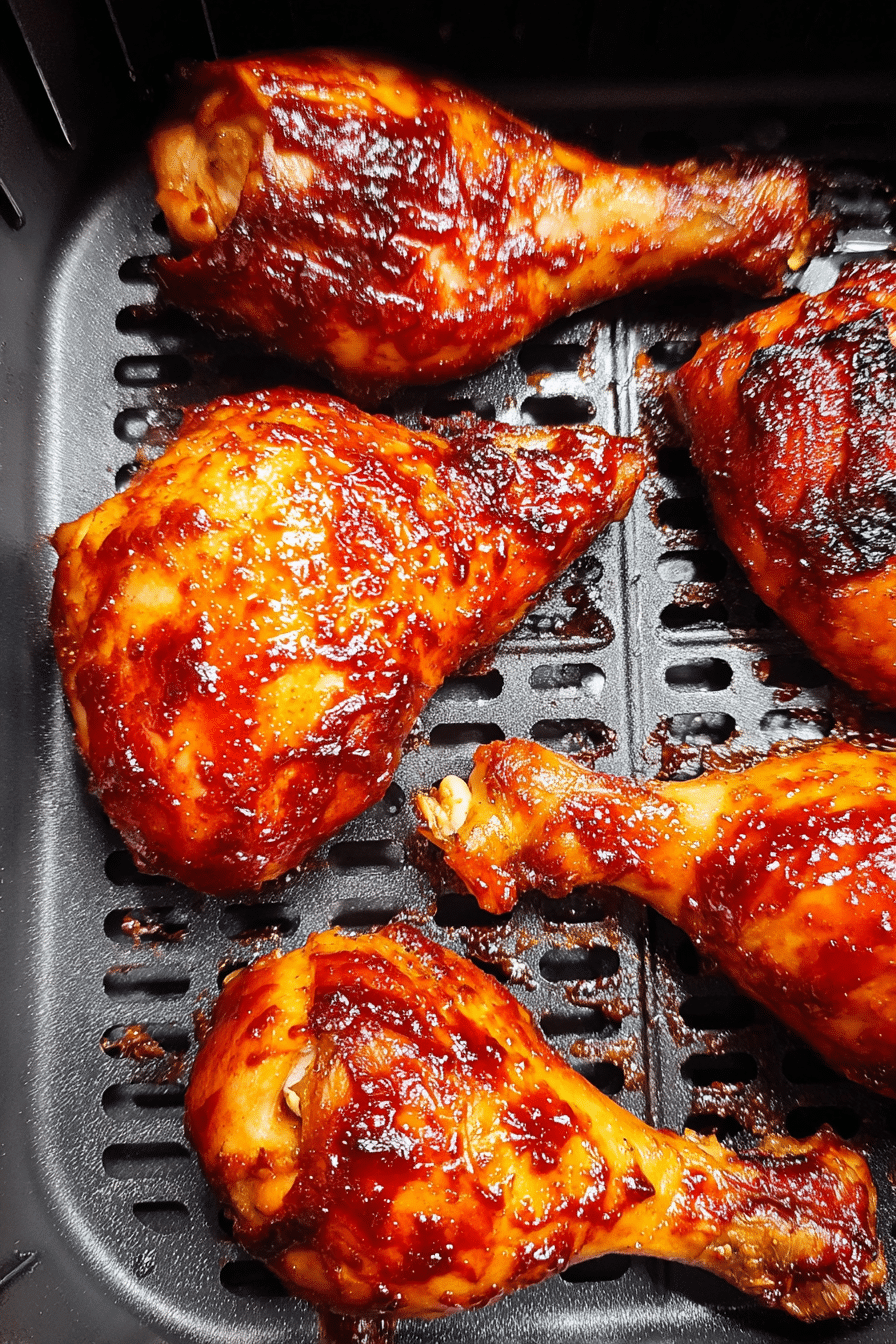
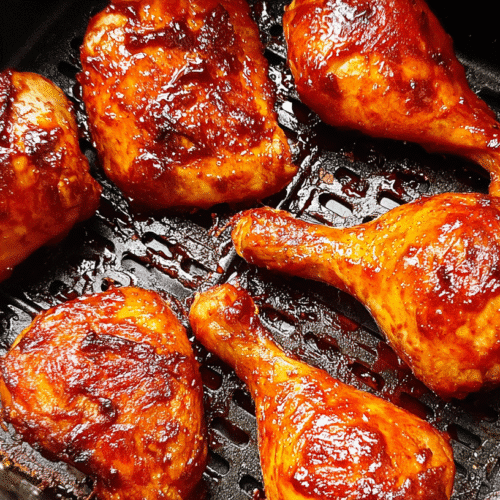
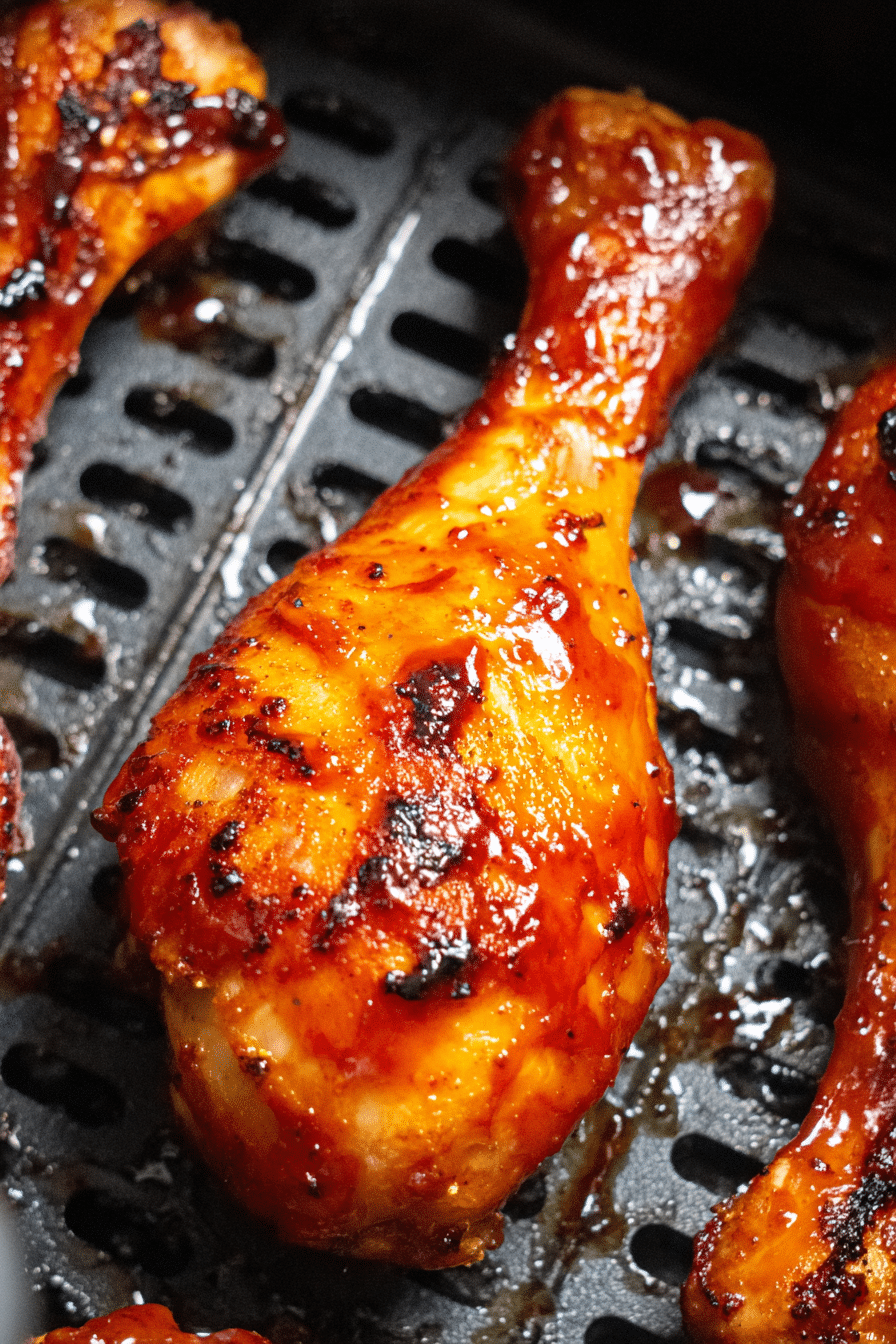
BBQ air fryer chicken delivers that smoky barbecue flavor with incredibly crispy skin that rivals any backyard grill, and I discovered this game-changer on the rainiest Saturday in Brooklyn history. Picture this: Jake had promised the kids we’d grill burgers and chicken in Prospect Park, but Mother Nature had other plans. Emma was giving me the teenage eye-roll treatment, Tyler was bouncing off our tiny apartment walls, and I’m staring at a whole chicken wondering how the heck I’m gonna make this work. Twenty-five minutes later, we’re all crowded around our little kitchen table eating BBQ chicken so good that Jake literally asked if I’d secretly ordered from our favorite spot on Seventh Avenue.
If you’ve been following my [Air Fryer Chicken Recipes] collection, you know I’m obsessed with getting that perfect crispy skin while keeping the meat juicy inside. But this BBQ version? It completely changed my perspective on indoor “grilling.” The air fryer’s rapid circulation creates this incredible crust when you nail the dry rub technique, and trust me, I’ve perfected it through many failed experiments that had my neighbors questioning my cooking skills.
In this guide, I’ll walk you through my foolproof method for BBQ air fryer chicken that delivers restaurant-quality results without firing up an actual grill. Plus, I’ll share all the pro tips I’ve learned from cooking countless batches in my cramped Brooklyn kitchen, including how to get that smoky flavor without any liquid smoke (game-changer) and why the resting time is just as crucial as the cooking time.

Table of Contents
Why This BBQ Chicken Works Perfectly in the Air Fryer
I’ll be honest, I was skeptical about making BBQ chicken in an air fryer until my Cosori proved me completely wrong. The breakthrough happened during one of those chaotic Sunday meal preps when I was juggling three different proteins. I’d rubbed down some chicken thighs with my go-to BBQ seasoning blend, thinking I’d just get them started in the air fryer before finishing on our fire escape grill setup (yes, that’s a real thing in Brooklyn apartments).
Here’s the thing about air fryers and BBQ chicken: the rapid hot air circulation creates what food scientists call the Maillard reaction at lightning speed. That’s the fancy term for the browning process that gives you those incredible flavors and textures. Where traditional oven-baking might take 45 minutes to achieve similar results, the air fryer concentrates that heat and gets you there in about 25 minutes. According to the USDA’s food safety guidelines, chicken needs to reach an internal temperature of 165°F, and the air fryer’s consistent heat distribution makes hitting that target foolproof.
My Ninja Foodi runs about 10 degrees hotter than my Cosori, so I’ve learned to adjust accordingly. But regardless of your model, the key is that concentrated heat creating a crispy exterior while sealing in the juices. I’ve compared this method to grilling outside, oven-roasting, and even pan-searing, and honestly? The air fryer wins every time for convenience and consistency. No flare-ups, no weather dependency, and no heating up my entire apartment in the summer.
Essential BBQ Air Fryer Chicken Preparation Tips
Choosing the Right Cut
When I’m shopping at our local Key Food, I always go for bone-in, skin-on pieces. Thighs and drumsticks are my absolute favorites for BBQ. The bone helps retain moisture during cooking, and that skin? That’s where the magic happens. I’ve tested this recipe with boneless pieces, and while they work, you miss out on that incredible crispy skin texture that makes this dish special.
Size matters here too. Pieces should be roughly the same thickness for even cooking. I learned this the hard way when Tyler got a perfectly cooked drumstick while Emma’s thigh was still pink inside. Not my finest parenting moment. If you’re working with a whole chicken cut into pieces, aim for portions that are about 4-6 ounces each.
Fresh chicken always beats frozen for texture, but life happens. If you’re starting with frozen pieces (and trust me, I’ve been there), make sure they’re completely thawed and patted bone-dry. Any excess moisture will steam instead of crisp, and nobody wants soggy BBQ chicken.
Pre-Cooking Prep Secrets
This next part is crucial: moisture is the enemy of crispy skin. I pat my chicken completely dry with paper towels, then let it sit uncovered in the fridge for at least 30 minutes before seasoning. Jake thinks I’m crazy for this step, but it makes such a difference. The surface needs to be as dry as possible for that BBQ rub to really adhere and create a proper crust.
My signature dry rub gets applied generously, and I mean really go for it. Brown sugar, smoked paprika, garlic powder, onion powder, salt, pepper, and just a touch of cayenne. The brown sugar caramelizes beautifully under that intense air fryer heat, creating those gorgeous caramelized edges you see on restaurant BBQ. I massage the rub into every crevice, under the skin where possible, and let it sit at room temperature for about 20 minutes while I prep everything else.
Here’s a trick I discovered by accident: lightly spray the seasoned chicken with cooking oil just before air frying. I was rushing one evening and accidentally grabbed the oil spray instead of my usual brush, and the results were incredible. The oil helps the seasoning stay put and promotes even browning. Don’t go crazy—just a light mist all over.

Amazing BBQ Air Fryer Chicken
Equipment
- Air fryer (5-8 quart capacity)
- Instant-read thermometer
- Tongs
- Small mixing bowl
Ingredients
4-6 bone-in, skin-on chicken pieces (thighs and drumsticks)
2 tablespoons brown sugar
1 tablespoon smoked paprika
1 teaspoon garlic powder
1 teaspoon onion powder
1 teaspoon salt
1/2 teaspoon black pepper
1/4 teaspoon cayenne pepper (optional)
Cooking oil spray
BBQ sauce for finishing (optional)
Instructions
Pat chicken completely dry with paper towels. Let sit uncovered in refrigerator for 30 minutes if time allows.
Combine all dry ingredients in a small bowl to create the BBQ rub.
Remove chicken from fridge and let come to room temperature for 20 minutes.
Generously coat chicken pieces with the dry rub, massaging into skin and crevices.
Preheat air fryer to 380°F for 3 minutes.
Lightly spray seasoned chicken with cooking oil.
Place chicken skin-side down in air fryer basket, ensuring pieces don’t touch.
Cook for 15 minutes, then carefully flip each piece.
Continue cooking for 8-10 minutes until internal temperature reaches 165°F.
Let rest for 5 minutes before serving. Brush with BBQ sauce if desired.
Notes
Nutrition
Step-by-Step BBQ Air Fryer Chicken Process
Setting Up Your Air Fryer
The great preheating debate ends here: yes, you should preheat for BBQ chicken. I preheat to 380°F for exactly 3 minutes. That’s enough to get that initial sear going but not so hot that the outside burns before the inside cooks through. My Cosori takes about 2 minutes to reach temperature, while my Ninja needs closer to 4 minutes.
I never use parchment paper for chicken pieces because they need maximum air circulation, but I do give the basket a light spray with avocado oil. Nothing fancy—just enough to prevent sticking. Arrangement is everything: pieces shouldn’t touch each other, and if you’re cooking different cuts together, put the thickest pieces toward the back where the heat tends to be most intense.
Your air fryer basket should look spacious, not crowded. I can fit about 4-5 pieces in my 5.8-quart Cosori, maybe 6 in the larger Ninja. If you’re feeding a crowd, cook in batches. Trust me, overcrowding leads to uneven cooking and steaming instead of crisping.
During Cooking
Start with 15 minutes skin-side down. This is where patience pays off. You’ll hear that beautiful sizzling sound almost immediately, and around the 8-minute mark, the most incredible smoky aroma fills the kitchen. Emma always knows what’s for dinner the second she walks through the door.
The flip happens at exactly 15 minutes, and here’s where you need to be gentle but confident. I use tongs to carefully turn each piece, being mindful not to tear that gorgeous crispy skin we’ve worked so hard to create. After flipping, another 8-10 minutes usually does it, but every air fryer has its personality.
Visual cues are your best friend: look for that deep mahogany color with slightly darker edges where the brown sugar has caramelized. The skin should look tight and crispy, not soft or flabby. When in doubt, use an instant-read thermometer. 165°F in the thickest part, avoiding bone contact.
Finishing Touches
This is where most people mess up. They serve immediately. Don’t be that person. Let your BBQ chicken rest for exactly 5 minutes after cooking. This allows the juices to redistribute throughout the meat, preventing them from running all over your cutting board the second you slice into it.
During those 5 minutes, I like to brush on just a tiny bit of my favorite BBQ sauce for extra gloss and flavor. Nothing heavy—just enough to add that final barbecue punch. The residual heat from the chicken warms the sauce perfectly without making the skin soggy.
Pro Tips from My Kitchen
After testing this recipe probably 50 times (Jake’s keeping count), I’ve learned some tricks that make the difference between good BBQ chicken and absolutely incredible BBQ chicken. Temperature control varies significantly between air fryer models. My Instant Vortex runs about 15 degrees cooler than advertised, so I’ve learned to adjust accordingly.
For extra smoky flavor without liquid smoke, I add a tiny pinch of smoked salt to my dry rub. The first time I tried this, Tyler asked if we’d actually grilled outside. According to America’s Test Kitchen’s comprehensive technique guide, even small amounts of smoked seasonings can replicate that outdoor barbecue flavor profile indoors.
Batch cooking strategy: if you’re meal prepping or feeding a crowd, cook all pieces to about 90% doneness, then finish them together for the last few minutes. This ensures everything comes out hot and perfectly timed. I learned this trick when hosting Tyler’s basketball team dinner. Twelve hungry 11-year-olds don’t wait for food.
Here’s something I discovered completely by accident: if your chicken looks perfect but hasn’t quite hit 165°F internally, tent it with foil for the last 2-3 minutes of cooking. This prevents the outside from overcooking while allowing the interior to finish gently. Works like a charm for those slightly thicker pieces.
Common mistake alert: never, ever use BBQ sauce during the cooking process. The sugars will burn and create a bitter flavor that ruins everything. I learned this during my early air fryer days when I thought more sauce meant more flavor. Save the sauce for finishing or serving on the side.

BBQ Air Fryer Chicken Serving and Storage
Serving Suggestions
This BBQ chicken pairs beautifully with classic sides that won’t compete with those bold flavors. My go-to family combination is air fryer corn on the cob (yes, it works!) and a simple coleslaw that cuts through the richness. During summer, we’ll add some fresh watermelon or peach slices—the sweetness complements the smoky spice perfectly.
For entertaining, I like to present the chicken on a large wooden cutting board with small bowls of different BBQ sauces for dipping. Jake’s a traditionalist and goes for sweet Kansas City style, while Emma prefers tangy Carolina-style sauce. Tyler, being 11, just wants extra ranch.
Presentation tip that takes zero effort: sprinkle some fresh chopped parsley or green onions over the finished chicken. It adds a pop of color and freshness that photographs beautifully and makes the dish look restaurant-worthy.
Storage and Reheating
BBQ chicken stores beautifully in the refrigerator for up to 4 days, and here’s the secret to maintaining that crispy skin: let it cool completely before storing, then wrap loosely in foil rather than sealing in plastic. This prevents the skin from getting soggy from trapped steam.
For reheating, and this is crucial, use your air fryer again at 350°F for about 3-4 minutes. Don’t microwave unless you want to turn that beautiful crispy skin into rubber. The air fryer brings back almost all of the original texture and flavor. I actually think leftover BBQ chicken reheated properly tastes even better than fresh sometimes.
If you’re meal prepping, I recommend storing the pieces individually wrapped, then combining portions as needed. This way, everyone can grab their preferred amount without having to unwrap a whole batch. Very practical for busy weeknight dinners when everyone’s eating at different times.
BBQ Air Fryer Chicken Variations to Try
Once you’ve mastered the basic technique, the flavor possibilities are endless. I’ve had great success with a Nashville hot version using cayenne and paprika, though I learned to warn the kids first after Tyler’s dramatic reaction to the heat level.
Seasonal adaptations work beautifully too. During fall, I add a touch of cinnamon and nutmeg to the rub for a warm spice profile that pairs perfectly with roasted vegetables. Spring calls for lighter herbs like thyme and rosemary mixed into the dry rub.
For dietary modifications, this recipe works perfectly for keto followers. Just skip the brown sugar in the rub and use a sugar-free alternative. I’ve tested monk fruit sweetener with good results, though the caramelization isn’t quite as dramatic.
Failed experiment confession: I once tried to make a teriyaki version by adding soy sauce to the rub. Disaster. The extra moisture prevented proper crisping, and the salt content was overwhelming. Stick to dry seasonings for the best results, and save wet marinades for other cooking methods.
Conclusion
What started as a rainy day solution has become our family’s go-to BBQ chicken method, rain or shine. There’s something magical about achieving those deep, smoky flavors and crispy textures without firing up a grill or heating up the entire kitchen. And honestly, the consistency you get with an air fryer beats outdoor grilling any day. No hot spots, no weather worries, no Tyler complaining about mosquitoes.
The best part? Once you nail this technique, you’ll find yourself adapting it for different flavor profiles and making it your own. Emma’s already requesting a honey mustard version, and Jake’s been dropping hints about trying a jerk spice blend. Sometimes the best discoveries happen when you’re just trying to feed your family something delicious on a random weeknight in Brooklyn.
Frequently Asked Questions
Can I cook this from frozen?
Technically yes, but you’ll need to add about 8-10 minutes to the total cooking time and the skin won’t crisp as beautifully. I always recommend thawing first for the best results. If you’re starting frozen, pat off any ice crystals and increase the initial cooking time before flipping.
Why is mine not getting crispy?
Nine times out of ten, it’s a moisture issue. Make sure your chicken is completely dry before seasoning, don’t overcrowd the basket, and resist the urge to open the air fryer constantly during cooking. Each peek releases heat and steam that prevents proper crisping.
Can I double this recipe?
You can season double the amount, but cook in separate batches for best results. Overcrowding leads to steaming instead of crisping. I’ve learned it’s better to do two smaller batches than one overcrowded batch. The second batch actually cooks slightly faster since the air fryer is already heated.
What if I don’t have smoked paprika?
Regular paprika works fine, though you’ll miss some of that smoky depth. You can add a tiny pinch of chipotle powder instead, or even a small amount of garlic powder mixed with regular paprika. The key is maintaining that earthy, slightly sweet flavor profile.
How do I prevent the seasoning from burning?
Lower your temperature to 365°F if you notice the rub getting too dark too quickly. Some air fryers run hotter than others, and sugar-based rubs can caramelize rapidly. Also, make sure you’re not using too much oil spray, which can cause the seasonings to burn.
Is this healthier than traditional BBQ chicken?
Air frying uses significantly less oil than deep frying and allows fat to drain away during cooking. You’re getting similar flavors and textures to grilled chicken without the charred compounds that can form over open flames. According to Consumer Reports’ air fryer testing, this cooking method can reduce overall fat content while maintaining flavor and texture. Plus, cooking indoors means consistent results every time.
Can I make this ahead?
The seasoned raw chicken can sit in the fridge for up to 24 hours before cooking, which actually improves flavor penetration. Once cooked, it’s best served immediately, but reheats beautifully in the air fryer as mentioned above. I don’t recommend cooking completely ahead for best texture.

