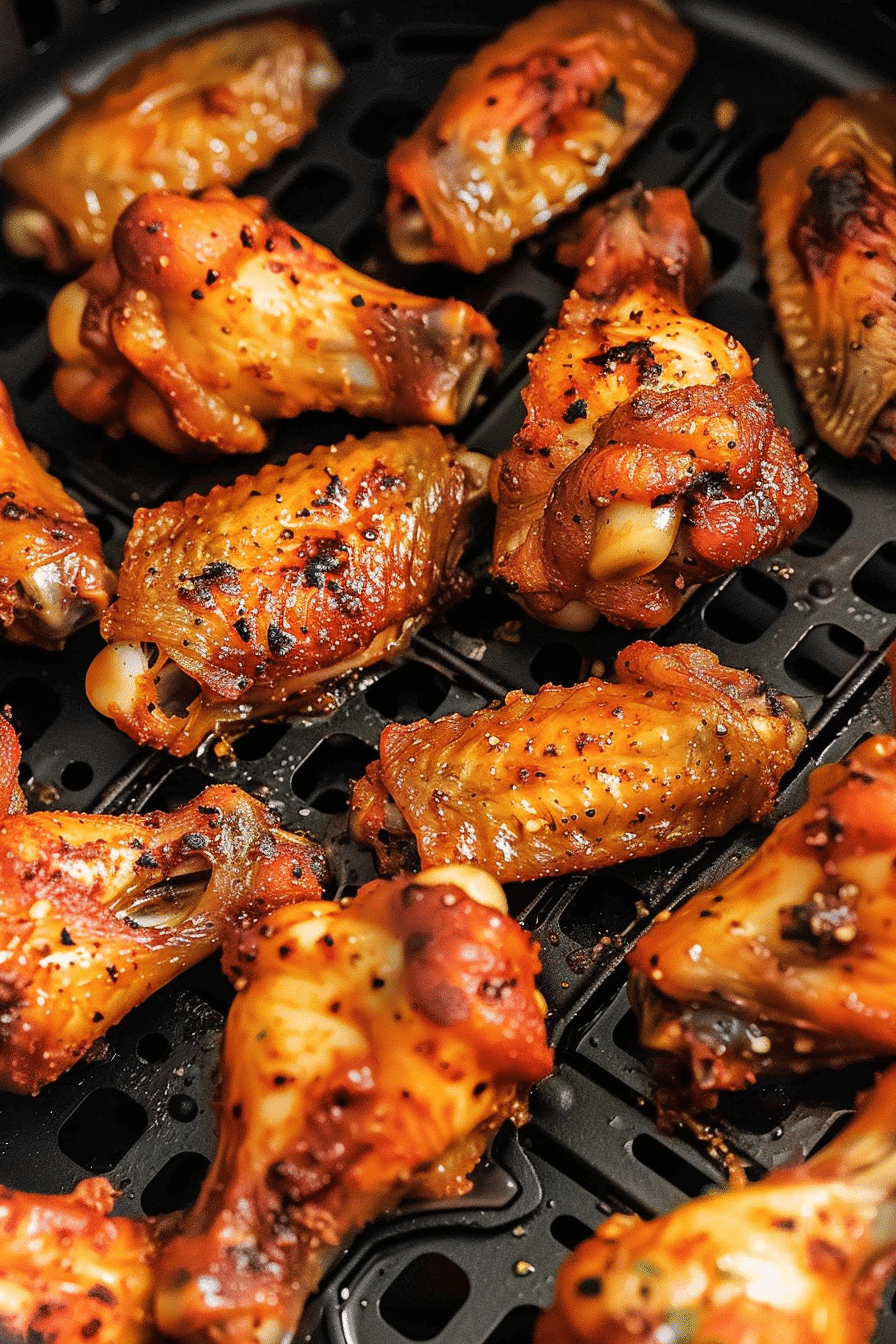
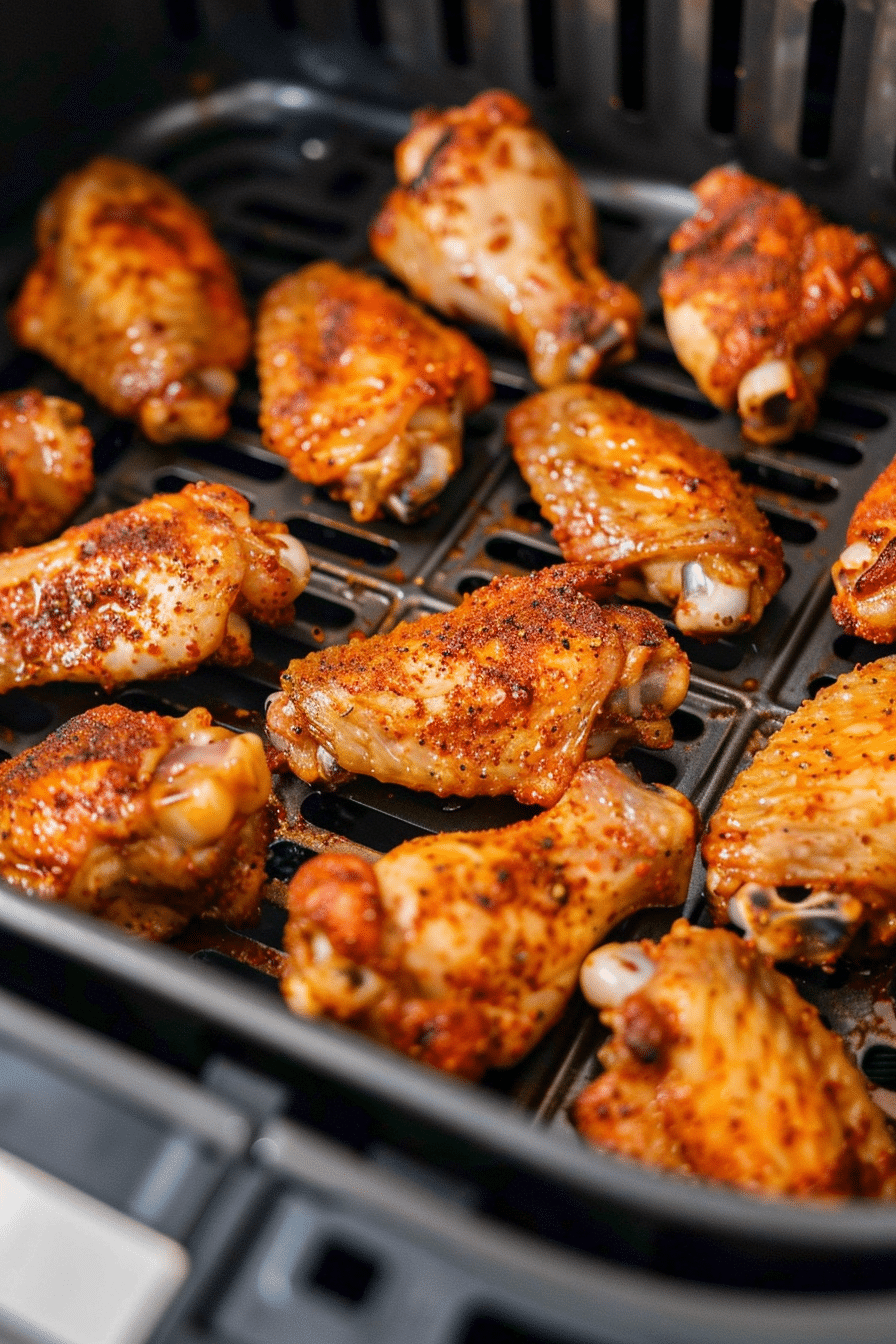
Perfect air fryer chicken wings are all about getting that restaurant-quality crispy skin while keeping the meat juicy and tender inside. I discovered this game-changing technique last fall when Tyler’s basketball team was coming over to watch the game, and I needed wings that would actually impress a bunch of teenage boys who think they know everything about food. Twenty-five minutes later, I had twelve kids asking if I could cater their next party – and Jake looking at me like I’d just performed actual magic in our tiny Brooklyn kitchen.
If you’ve been following my Air Fryer Chicken Recipes Collection, you know I’m always experimenting with new ways to get restaurant-quality results at home. But wings? They were my biggest challenge until I figured out the secret that separates soggy disappointments from crispy perfection. It’s not just about temperature or timing – though both matter – it’s about understanding how air circulation works with chicken skin.
In this ultimate guide, I’ll walk you through my foolproof method for wings that rival your favorite sports bar, plus all the pro tips I’ve learned from cooking literally hundreds of batches in my Cosori. We’re talking Buffalo, BBQ, honey garlic, and even some creative flavors that’ll make your next game day unforgettable.

Table of Contents
Why Air Fryer Chicken Wings Work So Perfectly
Here’s the thing about wings that makes them absolutely perfect for air frying: they’re basically designed for this cooking method. The skin-to-meat ratio is ideal for that rapid hot air circulation, and the natural fat content means they stay juicy while the outside gets incredibly crispy. It’s like wings and air fryers were meant to be together.
I spent way too many years struggling with oven-baked wings that never got crispy enough, or deep-fried ones that turned my kitchen into an oil-splattered disaster zone. The air fryer gives you all that crispy goodness with about 80% less oil and zero mess on my already-cramped counters. Plus, cleanup is basically just washing one basket instead of scrubbing oil stains off everything within a three-foot radius.
The magic happens because the circulating hot air hits every surface of the wing simultaneously, creating that perfect golden-brown crust through the Maillard reaction. Unlike traditional frying where the oil temperature can fluctuate, or oven baking where heat comes from one direction, air frying gives you consistent, all-around heat that renders the fat beautifully while crisping the skin.
My Ninja Foodi handles about two pounds of wings perfectly, while my trusty Cosori works best with about a pound and a half. The key is understanding your specific model’s hot spots – something I learned after making way too many batches with uneven browning.
Essential Air Fryer Chicken Wings Preparation Tips
Choosing the Right Wings
When I’m at the butcher counter, I’m looking for wings that are roughly the same size – this ensures even cooking throughout the batch. I prefer buying whole wings and cutting them myself into drumettes and flats because you get better quality control, but honestly? On a busy Tuesday when Emma has soccer practice and Tyler needs help with algebra, those pre-cut wings from the grocery store work just fine.
Fresh wings always give better results than frozen, but I’m not gonna lie – sometimes you forget to defrost and dinner waits for no one. If you’re working with frozen wings, make sure they’re completely thawed and patted dry. I learned this lesson the hard way when I tried to rush the process and ended up with wings that steamed instead of crisped.
For the best results, look for wings that still have the skin intact and aren’t pre-marinated. Those pre-seasoned ones from the store often have too much moisture and weird additives that prevent proper crisping. Trust me, you want to start with a clean slate.
Pre-Cooking Prep Secrets
This is where most people mess up, and I was guilty of this for months before I figured out the secret. You absolutely cannot skip the drying step. I’m talking about patting those wings bone-dry with paper towels, then letting them sit uncovered in the refrigerator for at least an hour, preferably overnight. This step removes surface moisture that prevents crisping.
I call it “the overnight miracle” because the difference is honestly dramatic. Wings that sit overnight in the fridge develop this slightly tacky surface that crisps up beautifully in the air fryer. If you’re in a rush, at least pat them dry and let them sit at room temperature for 20 minutes while you preheat.
For seasoning, I’ve found that simple is usually better. Salt and pepper are non-negotiable – the salt helps draw out more moisture and seasons the meat, while pepper adds that subtle heat. Beyond that, garlic powder and paprika are my go-tos for basic wings. Save the fancy sauces for after cooking, when they can stick to that perfect crispy surface.

Perfect Air Fryer Chicken Wings
Equipment
- 1 Air fryer 5.8-quart or larger recommended
Ingredients
2 lbs chicken wings (split into drumettes and flats)
1 tablespoon olive oil (optional)
2 teaspoons salt
1 teaspoon black pepper
1 teaspoon garlic powder
1 teaspoon paprika
1/2 teaspoon onion powder
- For Buffalo Sauce:
1/2 cup Frank’s RedHot sauce
3 tablespoons butter, melted
1 tablespoon apple cider vinegar
Instructions
Pat wings completely dry with paper towels. For best results, refrigerate uncovered for 1 hour or overnight.
Preheat air fryer to 380°F for 5 minutes.
Toss wings with oil (if using) and season with salt, pepper, garlic powder, paprika, and onion powder.
Arrange wings in single layer in air fryer basket. Don’t overcrowd.
Cook at 380°F for 12 minutes, flipping once at 6-minute mark.
Increase temperature to 400°F and cook 8-10 minutes more until golden brown and crispy.
Check internal temperature reaches 165°F.
For Buffalo wings, toss hot wings with sauce mixture in a large bowl.
Serve immediately while hot and crispy.
Notes
Nutrition
Step-by-Step Cooking Process
Setting Up Your Air Fryer
Preheating is absolutely crucial for wings – no shortcuts here. I preheat my air fryer to 380°F for about 5 minutes. This initial blast of heat starts the crisping process immediately when the wings hit the basket, instead of gradually warming up and potentially steaming the skin.
I lightly spray the basket with avocado oil cooking spray, but honestly, wings have enough natural fat that they rarely stick. If you’re using parchment paper (and cleanup is definitely easier if you do), make sure it’s perforated or the air won’t circulate properly. I learned this after watching parchment paper blow around my air fryer like confetti at a sad party.
For arrangement, single layer is the only way. I know it’s tempting to cram more wings in there, especially when you’re feeding a crowd, but overcrowding leads to steaming instead of crisping. In my 5.8-quart Cosori, I can fit about 10-12 wings comfortably. For bigger batches, I cook in rounds and keep the finished wings warm in a low oven.
The Two-Stage Cooking Method
Here’s my secret weapon that took months of experimentation to perfect: I cook wings in two stages at different temperatures. First stage is 380°F for 12 minutes to render the fat and start the crisping process. Then I bump it up to 400°F for the final 8-10 minutes to get that restaurant-quality crispy exterior.
At the 6-minute mark of the first stage, I flip all the wings. This isn’t optional – even cooking is crucial for wings. I use tongs to flip each wing individually because shaking the basket doesn’t give you the control you need. Yes, it takes an extra minute, but the results are worth it.
During the second stage, I’m watching more carefully. Around the 15-minute total mark, I start checking for that perfect golden-brown color. Some wings might be done at 18 minutes, others need the full 20. This is where knowing your air fryer’s personality comes in handy – my Ninja runs hotter and finishes wings about 2 minutes faster than my Cosori.

Sauce Application Timing
This is crucial: sauce goes on AFTER cooking, not before. I spent way too many batches learning this lesson the hard way. Pre-sauced wings burn, get soggy, or both. The exception is a very light dry rub, but even then, less is more during the actual cooking process.
For sauced wings, I toss them in a large bowl with the sauce immediately after they come out of the air fryer while they’re still hot. The residual heat helps the sauce adhere without making the skin soggy. If I’m making multiple flavors, I portion the wings into different bowls and sauce separately.
For extra crispy wings, I sometimes do a final 2-minute blast at 400°F after saucing, but this only works with thicker sauces like Buffalo or BBQ. Delicate sauces like honey garlic will burn.
Pro Tips from My Kitchen
After hundreds of batches and more trial and error than Jake cares to remember (our kitchen has smelled like wings more often than not), here are the game-changers I wish someone had told me from the start:
Room temperature matters more than you think. Wings straight from the fridge cook unevenly – cold spots in the meat while the outside overcooks. Twenty minutes on the counter before cooking makes a noticeable difference.
The flip timing is crucial. Too early and you don’t get proper browning on the first side. Too late and the bottom side doesn’t crisp properly. Six minutes for the first flip, then check at 15 minutes total to see if they need another flip.
Different wing sections cook at different rates. Drumettes usually need about 2 extra minutes compared to flats. If I’m doing a mixed batch, I’ll pull the flats first and let the drumettes finish.
Baking powder is a secret weapon for extra crispy skin. A light dusting (maybe 1/2 teaspoon per pound) mixed with your seasonings helps break down proteins in the skin for maximum crispiness. But don’t overdo it – too much makes them taste weird.
Serving and Storage
Classic Wing Sauce Variations
Buffalo sauce is the classic for a reason – that tangy, buttery heat is perfect with crispy wings. I make mine with Frank’s RedHot, butter, and a splash of apple cider vinegar. The ratio is about 1/2 cup sauce to 3 tablespoons butter for wings that serve 4-6 people.
For BBQ wings, I brush them with sauce during the last 2 minutes of cooking, then toss with more sauce after. This gives you that sticky, caramelized exterior without burning. My go-to is a mix of store-bought BBQ sauce with a splash of apple juice and a pinch of smoked paprika.
Honey garlic is Emma’s favorite – equal parts honey and soy sauce with minced garlic and a squeeze of lime. This one goes on after cooking only, since the honey will burn. Tyler’s obsessed with my “everything bagel” wings – just toss hot wings with everything bagel seasoning and a drizzle of ranch.
Asian-inspired wings are having a moment in our house. Soy sauce, rice wine vinegar, sesame oil, and sriracha make an incredible glaze. Sprinkle with sesame seeds and chopped green onions for that restaurant presentation.
Storage and Reheating
Leftover wings (if there are any) keep in the fridge for 3-4 days. The key to reheating is bringing back that crispy texture, and the air fryer does this better than any other method. Three to four minutes at 375°F and they’re almost as good as fresh.
Never microwave wings if you want to maintain any semblance of texture. The microwave turns that beautiful crispy skin into sad, rubbery disappointment. If the air fryer isn’t available, a hot oven (450°F) for about 5 minutes works, but air fryer reheating is definitely superior.
For meal prep, I sometimes cook plain wings on Sunday and sauce them throughout the week as needed. Unsauced wings reheat better and you can switch up flavors depending on your mood.
Air Fryer Chicken Wings Variations to Try
Once you’ve mastered the basic technique, the flavor world is your oyster. I’ve had incredible success with lemon pepper wings – just toss hot wings with lemon zest, cracked black pepper, and a pinch of garlic powder. Simple but somehow fancy.
Parmesan garlic wings are another winner: toss hot wings with grated parmesan, minced garlic, Italian seasoning, and a drizzle of melted butter. The cheese gets slightly crispy from the residual heat.
For something different, try Korean-style wings with gochujang glaze. Mix gochujang paste with honey, rice vinegar, and sesame oil. It’s sweet, spicy, and completely addictive. Garnish with sesame seeds and sliced green onions.
My latest experiment that actually worked was “Nashville hot” wings – toss with a blend of cayenne, paprika, brown sugar, and a touch of maple syrup. Fair warning: these pack serious heat, but the maple balances it beautifully.
The Bottom Line
After all my experiments, successes, and yes, some spectacular failures, perfect air fryer wings come down to three non-negotiables: proper drying, adequate space in the basket, and the two-stage cooking method. What started as my attempt to feed Tyler’s hungry basketball team has become our most requested recipe for everything from casual Tuesday dinners to Emma’s birthday party.
These wings have impressed everyone from my skeptical Italian mother-in-law to the pickiest teenagers in Park Slope. They’ve turned regular weeknight dinners into something the whole family actually gets excited about, and honestly, there’s something pretty magical about that.
So grab whatever wings you can find – whether it’s the fancy organic ones from Union Market or the family pack from your regular grocery store – and give this method a try. Your family might just start planning their weekends around your wing nights, and trust me, that’s not the worst problem to have.
Frequently Asked Questions
Frequently Asked Questions
Yes, absolutely. Wings need to be flipped at least once, preferably at the 6-minute mark, for even browning. The air circulation is good, but not perfect – flipping ensures both sides get that beautiful crispy texture we’re after.
Can I cook frozen wings directly?
I don’t recommend it. Frozen wings release too much moisture during cooking, which prevents proper crisping. Always thaw completely and pat dry for best results. If you’re in a time crunch, run them under cool water for 15-20 minutes to speed thawing.
Why aren’t my wings getting crispy?
Usually it’s one of three things: not patting them dry enough, overcrowding the basket, or not preheating properly. Make sure wings are bone dry, give them space in the basket, and always preheat your air fryer for 3-5 minutes before adding wings.
How do I prevent wings from sticking?
Light cooking spray on the basket helps, but wings rarely stick if they’re properly dried and your air fryer is preheated. If sticking is a persistent problem, check that your basket isn’t damaged or overly worn – scratched surfaces tend to grab food more.
Can I make wings ahead for a party?
Cook them fully, then reheat in the air fryer when guests arrive. They’ll taste almost as good as fresh. For large parties, I cook wings in batches throughout the day and reheat everything together right before serving. Takes about 3-4 minutes at 375°F.
What’s the best oil for air fryer wings?
Honestly, wings have enough natural fat that you barely need any oil. If you want to use some, avocado oil has the highest smoke point, but a light cooking spray is usually sufficient. Don’t over-oil or you’ll get greasy instead of crispy.
How do I know when wings are done?
Internal temperature should reach 165°F, but visually, you’re looking for deep golden-brown skin that looks crispy and slightly bubbled. The wings should feel firm to the touch, not soft or squishy. Experience helps, but a meat thermometer never lies.

