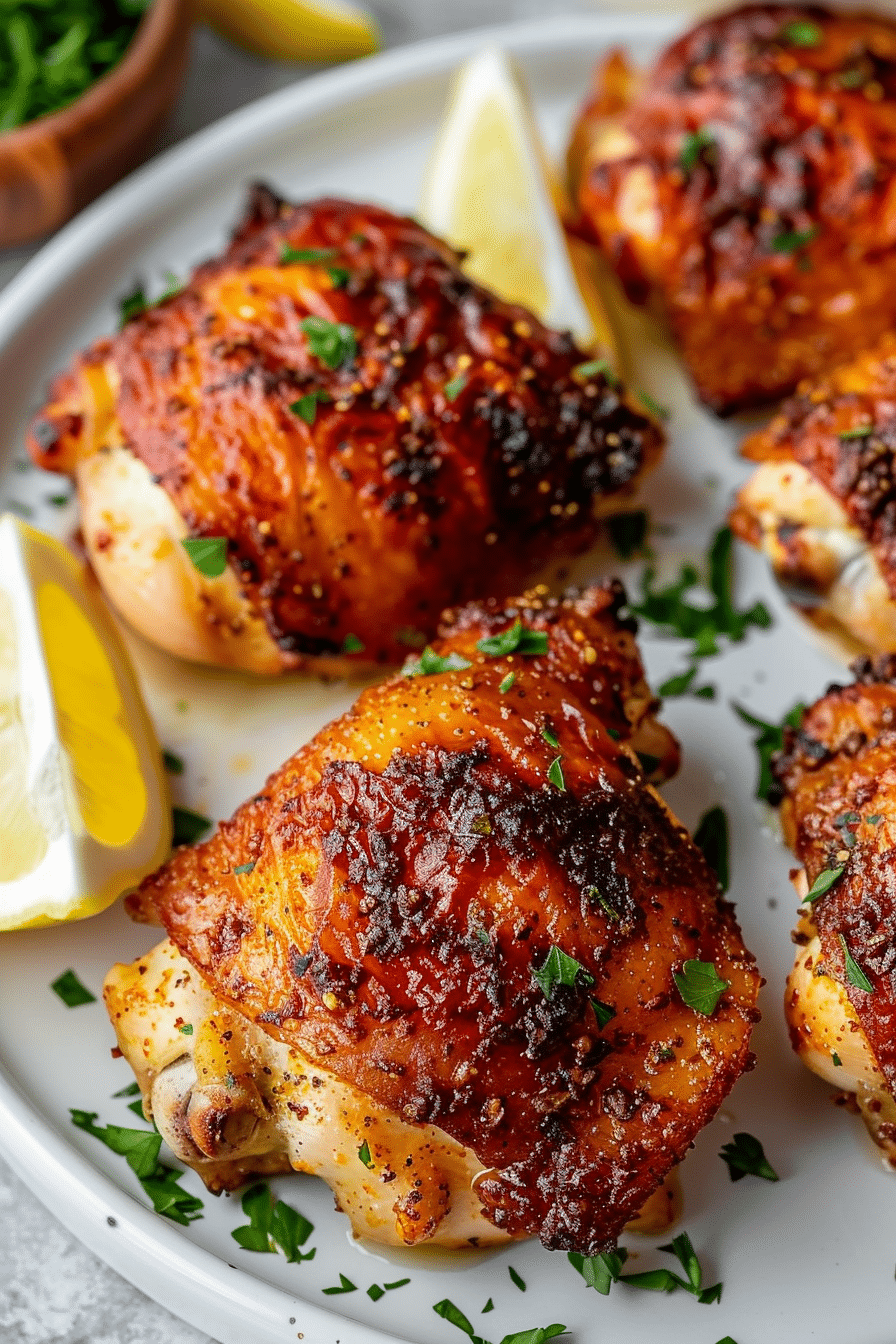
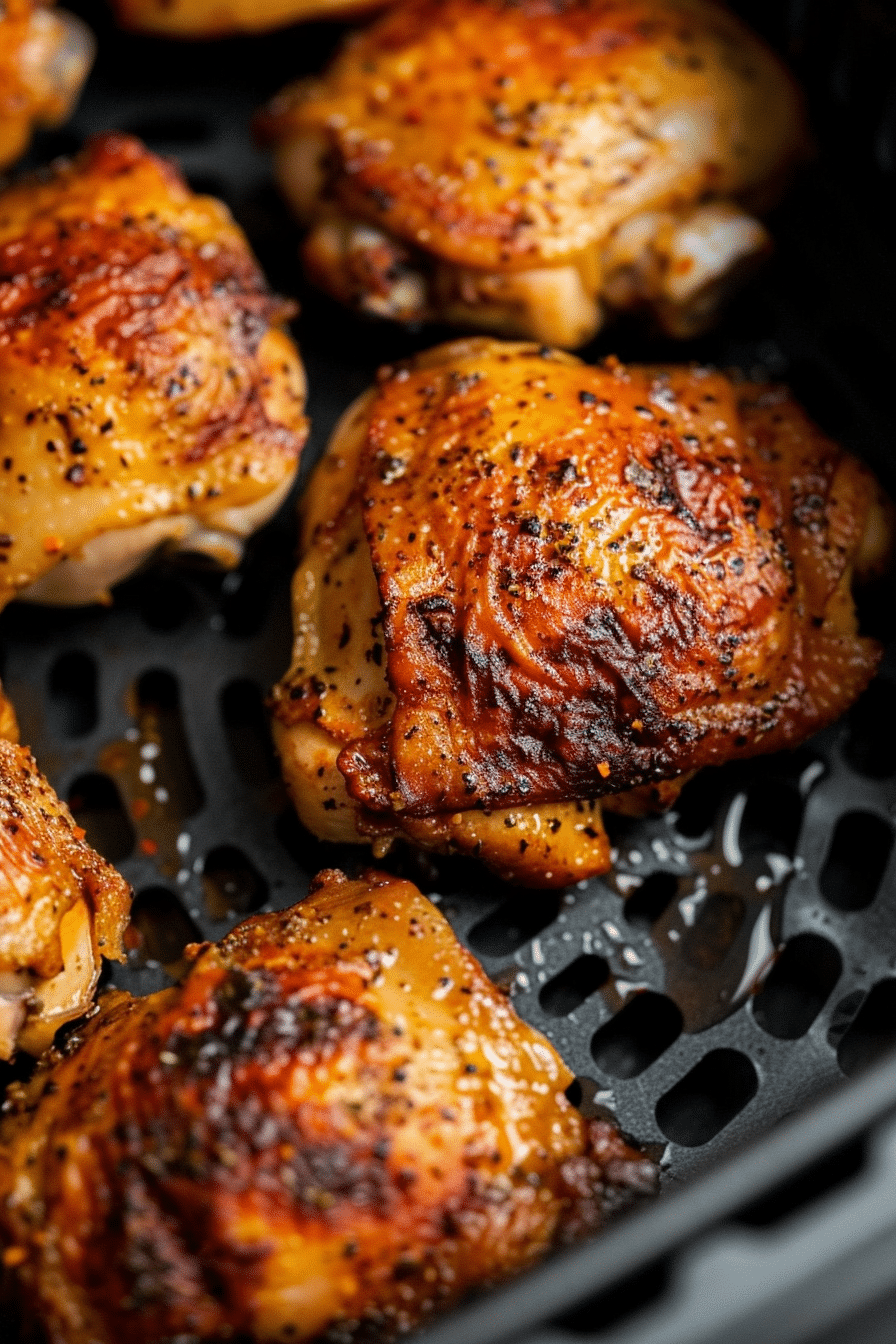
Air fryer chicken thighs deliver restaurant-quality results with minimal effort – crispy skin and incredibly juicy meat every single time. I’ll be honest, I used to be intimidated by dark meat because I’d either undercook it (hello, food safety paranoia) or turn it into leather trying to get it “done enough.” But once I figured out the sweet spot for thighs in my Cosori, they became our weeknight dinner MVP.
If you’ve been following my [Air Fryer Chicken Recipes] collection, you know I’m obsessed with getting that perfect balance of crispy exterior and tender interior. But thighs? They took me longer to master than wings or breasts because they’re more forgiving in some ways and trickier in others. The fat content works in your favor for moisture, but getting that skin to crisp up without overcooking took some trial and error.
In this guide, I’ll share my foolproof method for thighs that’ll have your family asking what restaurant you ordered from. We’re talking golden-brown skin that shatters when you bite it, meat so tender it practically falls off the bone, and cooking times that actually work with real life – not some fantasy world where everyone has perfectly uniform chicken pieces.

Table of Contents
Why Air Fryer Chicken Thighs Are a Game Changer
Let me tell you about the night I became a true believer. Jake was working late, the kids had soccer practice until 6:30, and I had exactly nothing planned for dinner. I grabbed a pack of bone-in thighs from the freezer (yes, frozen – we’ll talk about that), threw them in my air fryer with some basic seasonings, and twenty-five minutes later we had a meal that tasted like I’d been planning it all week.
The magic happens because of how air fryers circulate hot air around the thighs. Unlike the oven where the bottom stays soggy, that constant air movement crisps up the skin all around while the fat renders slowly, keeping the meat incredibly moist. It’s like having a tiny convection oven that works twice as fast and uses half the energy.
I’ve compared my air fryer thighs to oven-roasted ones side by side, and honestly? The air fryer wins every time. The skin gets crispier, the cooking time is cut in half, and there’s no heating up my entire Brooklyn apartment in the middle of summer. Plus, cleanup is just the basket instead of scrubbing a roasting pan.

Air Fryer Chicken Thighs
Equipment
- 1 Air fryer 5.8-quart or larger recommended
Ingredients
4 – bone-in, skin-on chicken thighs – (about 1.5-2 lbs)
1 – teaspoon – salt
1/2 – teaspoon – black pepper
1/2 – teaspoon – garlic powder
1/2 – teaspoon – paprika
1/4 – teaspoon – onion powder
cooking spray
Instructions
Pat chicken thighs completely dry with paper towels
Mix all seasonings in a small bowl
Season thighs on both sides, rubbing spices under the skin where possible
Preheat air fryer to 380°F for 3 minutes
Lightly spray air fryer basket with cooking spray
Place thighs skin-side down in basket, don’t overcrowd
Cook for 12 minutes, then flip skin-side up
Cook 8-12 more minutes until internal temperature reaches 165°F
Let rest 3-4 minutes before serving
Notes
Nutrition
Essential Preparation Tips
Choosing the Right Thighs
When I’m at the grocery store, I always go for bone-in, skin-on thighs. I know boneless seems easier, but trust me on this – the bone helps regulate temperature so you get even cooking, and that skin is where all the flavor and texture magic happens.
Look for thighs that are roughly the same size so they cook evenly. I’ve learned the hard way that one massive thigh mixed with tiny ones means some are perfect while others are either raw or dried out. If your pack has wildly different sizes, save the biggest ones for another batch.
Fresh is great, but frozen works too. I actually keep a bag of frozen thighs in my freezer because they’re usually a better price, and honestly, once they’re seasoned and cooked, no one can tell the difference. The key is planning ahead for thaw time or using my quick-thaw trick (more on that below).
Pre-Cooking Prep Secrets
Here’s where I see people mess up constantly: they skip the pat-dry step. Moisture is the enemy of crispy skin, so even if your thighs look dry, hit them with paper towels. I go through at least three paper towels per batch, getting under the skin, around the bone – everywhere.
If you’re using frozen thighs, my emergency thaw method is running them under cold water for about 10 minutes, then the paper towel treatment. They don’t need to be completely thawed – just enough that they’re not ice blocks.
For seasoning, I’ve found that salt needs at least 15 minutes to work its magic, but longer is better. When I remember (which is maybe 60% of the time), I’ll salt them in the morning before work. The salt draws out moisture initially, then gets reabsorbed along with flavor. It’s like a mini dry-brine situation.
Step-by-Step Cooking Process
Setting Up Your Air Fryer
I preheat my Cosori to 380°F for about 3 minutes. Some people swear preheating doesn’t matter, but I’ve done the side-by-side tests, and preheated air fryer skin gets crispier faster. Those first few minutes of intense heat are crucial for skin texture.
For the basket, I lightly spray with avocado oil cooking spray. Not a heavy coat – just enough so nothing sticks. I’ve tried parchment paper with thighs, but honestly, it just gets in the way when you need to flip them, and the skin doesn’t crisp as well.
Arrange the thighs skin-side down first. This seems backward, but starting with the skin against the hot basket gives you better initial searing. Don’t overcrowd – I can fit 4 medium thighs in my 5.8-quart basket comfortably. Any more and the air can’t circulate properly.
During Cooking
Here’s my tried-and-true timeline: 12 minutes skin-side down, flip, then 8-12 more minutes skin-side up. The exact time depends on size, but I always check with an instant-read thermometer – 165°F in the thickest part as recommended by the USDA, not touching bone.
At the flip point (12 minutes), don’t freak out if the skin looks a little pale. The real browning happens during the second phase when all that rendered fat helps with the crisping. This is also when I brush on any glaze or sauce if I’m using one, but honestly, well-seasoned thighs don’t need anything fancy.
The smell is your first clue things are going right. Around minute 15, your kitchen should smell amazing – that roasted chicken aroma with crispy edges. If you’re not getting that smell, your temperature might be too low or you’re overcrowding.
Finishing Touches
The last 2-3 minutes are when I add any fresh herbs if I’m feeling fancy. Rosemary and thyme can handle the heat, but delicate stuff like parsley goes on after cooking. I’ve learned that dried herbs can burn and turn bitter in those final high-heat moments.
Let the thighs rest for 3-4 minutes after cooking. I know it’s tempting to dive right in, but this rest time lets the juices redistribute. Plus, it gives the skin another minute to set up and get even crispier.
Pro Tips from My Kitchen
After cooking probably hundreds of batches, here are the tricks that actually make a difference:
Temperature matters more than time. I’ve found that 380°F is the sweet spot for most air fryer models. Lower and the skin doesn’t crisp; higher and you risk burning the outside before the inside is done.
Don’t flip too early or too often. I used to be a compulsive flipper, but thighs need that initial 12 minutes to render fat and start crisping. Flipping too soon just steams the skin.
For extra-crispy skin, try the baking powder trick. Mix a pinch of baking powder with your salt and spices. It raises the pH slightly, which helps proteins break down faster for better browning. Sounds science-y, but it works.
My Ninja Foodi runs about 15 degrees hotter than my Cosori, so I drop to 365°F. Every air fryer is different, so you might need to adjust. Keep notes on what works with your specific model.
For comprehensive safety guidelines, always follow USDA air fryer recommendations and check out Consumer Reports’ safety testing for additional precautions that can help prevent accidents and ensure the best cooking results.
Serving and Storage Air Fryer Buffalo Wings
Best Sides for Buffalo Wings
These thighs are incredible on their own, but they pair beautifully with roasted vegetables (toss them in the air fryer after the chicken), rice pilaf, or even just a simple salad. The crispy skin adds texture contrast to whatever sides you choose.
For busy weeknights, I’ll often make a double batch and use the extras for meal prep. Shredded thigh meat is perfect for tacos, grain bowls, or chicken salad. The dark meat stays moist even when reheated, unlike breast meat which can get dry.
How to Reheat Buffalo Wings in Air Fryer
Leftover thighs keep in the fridge for 3-4 days. I store them skin-side up in a container so the skin doesn’t get soggy against the bottom.
For reheating, the air fryer wins again. Three minutes at 350°F brings back most of that crispy skin texture. The microwave works for quick reheating, but you’ll lose the crispiness that makes these special.
Buffalo Wing Sauce Variations and Flavor Ideas
Once you’ve mastered the basic technique, the flavor possibilities are endless. My current obsession is a Greek-inspired version with lemon, oregano, and a touch of paprika. The kids love a barbecue dry rub version, and Jake’s favorite is the Nashville hot seasoning (though I go easy on the cayenne).
For a complete one-basket meal, I add baby potatoes and Brussels sprouts during the last 15 minutes of cooking. They absorb some of the rendered chicken fat and turn golden and delicious.
I’ve also done Asian-inspired glazes with soy sauce and honey added in the last few minutes. Just remember that sugary sauces can burn quickly, so save them for the end.

The Bottom Line
Perfect air fryer chicken thighs changed our weeknight dinner game completely. They’re forgiving enough for busy schedules but impressive enough for company. Once you nail the basic technique – crispy skin, juicy meat, proper temperature – you can adapt the seasonings to whatever your family loves.
The best part? Even when I completely wing it with whatever spices are in the cabinet, these thighs turn out delicious. That’s the beauty of dark meat and the magic of air frying working together.
Frequently Asked Questions
Can I cook frozen thighs directly in the air fryer?
Yes, but add about 5-7 extra minutes to the total cooking time and make sure they reach 165°F internal temperature. The skin won’t get quite as crispy as thawed thighs, but it’s still delicious and much better than oven-baked frozen thighs.
Why isn’t my skin getting crispy?
The most common culprits are not patting the thighs dry enough, overcrowding the basket, or cooking at too low a temperature. Make sure there’s space between each thigh for air circulation, and don’t skip that initial paper towel step.
Can I double this recipe?
You can cook more thighs, but do them in batches rather than overcrowding. Overcrowded thighs steam instead of roast, and you’ll lose that crispy skin we’re after. I’d rather cook two perfect batches than one mediocre large one.
What if I don’t have a meat thermometer?
The juices should run clear when you pierce the thickest part with a knife, and the skin should be golden brown all over. If you wiggle the drumstick and it moves easily at the joint, that’s usually a good sign it’s done. But honestly, a $10 instant-read thermometer is the best investment for air fryer cooking.
How do I prevent the outside from burning?
If your thighs are browning too fast, lower the temperature by 25 degrees and add a few minutes to the cooking time. Every air fryer runs a little differently, so don’t be afraid to adjust based on what you’re seeing.
Is this healthier than traditional fried chicken?
Absolutely. You’re using minimal added oil – just the natural fat from the chicken skin. It’s essentially roasted chicken with better texture and faster cooking time. Much less oil than deep frying, and the fat renders out into the basket instead of staying in the meat.
Can I marinate these first?
Yes, but pat them dry before air frying. Wet marinades can prevent proper browning. I prefer dry rubs or marinades that I pat off before cooking. If you want that marinated flavor, save some marinade as a finishing sauce instead.

