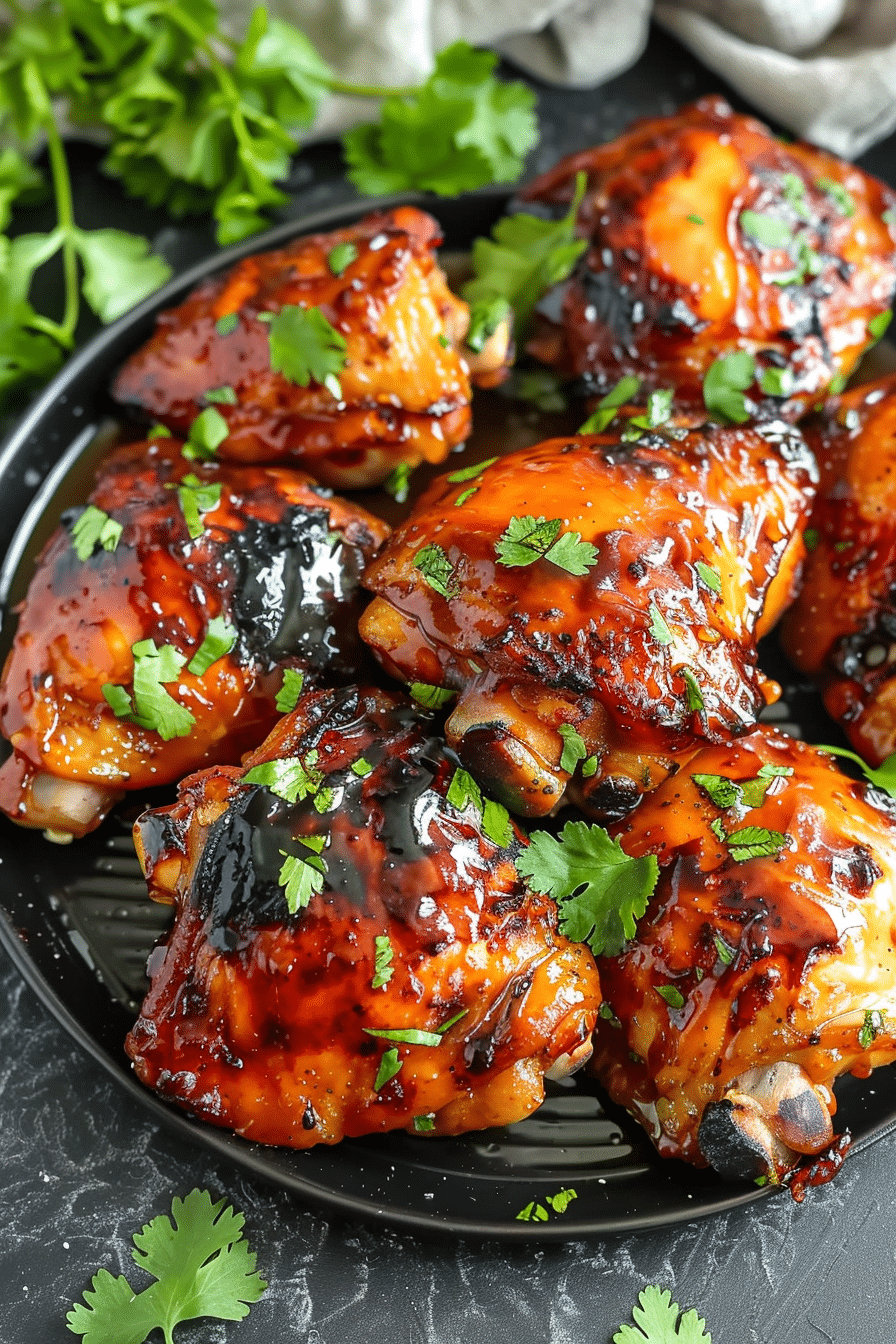
You know that honey garlic chicken from your go-to Chinese restaurant? The one with the glossy, sticky sauce that somehow manages to stay crispy even under all that delicious coating? I spent months trying to recreate it at home, going through probably fifteen different sauce combinations and three different cooking methods before I finally cracked the code with my air fryer. The breakthrough moment came when I realized the secret wasn’t just in the sauce – it was in the timing of when you add it.
My obsession with perfecting this recipe started when our usual takeout place changed their honey garlic sauce formula, and suddenly Tyler’s favorite dish tasted completely different. He was devastated, Emma was complaining, and Jake suggested we just “find a new place” – clearly not understanding the emotional attachment we all had to this specific flavor combination. That’s when I knew I had to figure out how to make it myself.
This recipe builds perfectly on everything I’ve shared in my [Air Fryer Chicken Recipes] series, but it adds this whole new layer of complexity with the sauce application. The result? Chicken that’s crispy on the outside, tender on the inside, and coated in a honey garlic glaze that’s somehow both sticky and crispy at the same time. It’s become such a family favorite that I’ve started doubling the batch every time I make it.
What you’re about to learn is my tested-and-perfected method for honey garlic chicken that actually stays crispy after saucing, plus all the little tricks I discovered along the way – including the one crucial step that prevents the sauce from making everything soggy.

Table of Contents
Why Air Fryer Honey Garlic Chicken Works So Perfectly
The genius of making honey garlic chicken in an air fryer isn’t just about getting crispy chicken – it’s about what happens when you add that sticky sauce at exactly the right moment. Traditional stir-frying or oven methods either give you soggy, sauce-soaked chicken or chicken with sauce that just slides right off. The air fryer gives you this perfect middle ground.
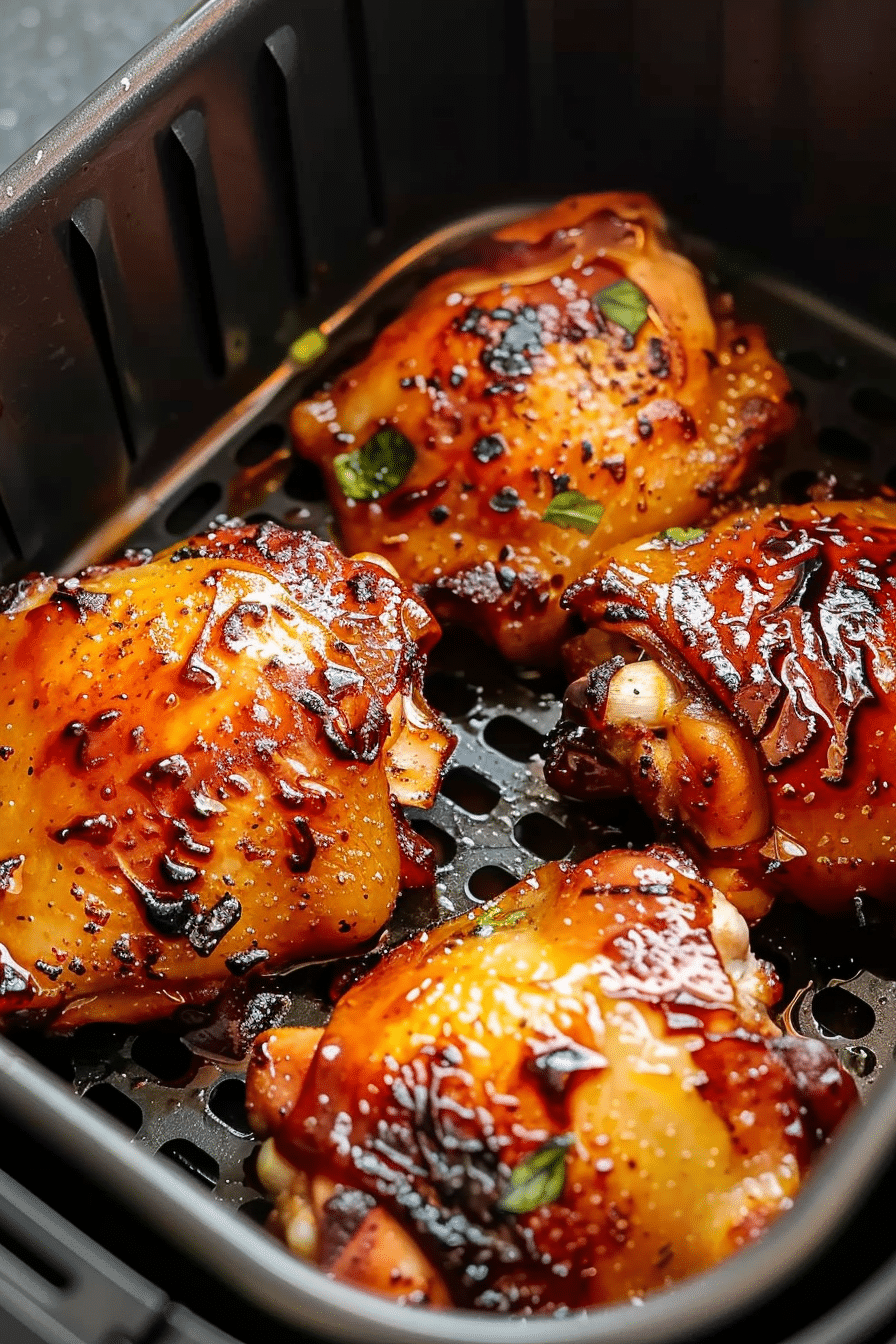
Here’s what happens: you cook the chicken until it’s golden and crispy, then add the sauce during the final few minutes. The circulating hot air caramelizes the honey while keeping the chicken’s exterior from getting soggy. It’s like having a tiny convection oven that’s specifically designed for creating that restaurant-style glaze.
I’ve tried making this same recipe in the oven, and while it’s decent, you just can’t get that same level of sauce adhesion and caramelization. Pan-frying works, but you’re standing there constantly stirring and trying to coat every piece evenly. With the air fryer, you literally toss everything together, give it a shake, and let the machine do the work.
The honey garlic combination is also perfect for air frying because honey browns beautifully under high heat, while garlic becomes mellow and sweet instead of harsh. Together, they create this complex flavor that’s simultaneously familiar and restaurant-special.

Perfect Honey Garlic Air Fryer Chicken
Equipment
- Air fryer (5.8-quart or larger)
- Small mixing bowl
- Tongs
- parchment paper
- Large bowl for tossing
Ingredients
- For the Chicken:
1.5 lbs boneless chicken thighs, cut into 1.5-inch pieces
2 tablespoons cornstarch
1/2 teaspoon salt
1/4 teaspoon black pepper
- For the Honey Garlic Sauce:
3 tablespoons honey
2 tablespoons soy sauce
3 cloves garlic, minced
1 tablespoon rice vinegar
Pinch of red pepper flakes
Instructions
Prep chicken: Pat chicken pieces dry and let come to room temperature for 15 minutes. Toss with cornstarch, salt, and pepper until evenly coated.
Make sauce: Whisk together honey, soy sauce, minced garlic, rice vinegar, and red pepper flakes. Set aside.
Preheat: Heat air fryer to 400°F for 3-5 minutes.
Cook chicken: Place chicken in single layer on perforated parchment in air fryer basket. Cook 12 minutes, shaking basket halfway through.
Add sauce: Remove chicken and toss with honey garlic sauce until evenly coated.
Caramelize: Return to air fryer for 3-4 minutes until sauce is caramelized and sticky. Shake basket after 2 minutes.
Serve: Let rest 2 minutes before serving to allow sauce to set.
Notes
- Don’t add sauce until chicken is golden and crispy (full 12 minutes)
- Use tamari instead of soy sauce for gluten-free version
- Sauce consistency should be like maple syrup – adjust with vinegar or honey
- Recipe doubles well but cook in batches to avoid overcrowding
- Leftovers keep 4 days refrigerated, reheat in air fryer 2-3 minutes
Nutrition
Tricks & Tips for Perfect Honey Garlic Air Fryer Chicken
Best Chicken Cuts for Honey Garlic Recipe
For this recipe, I’m team boneless thighs all the way. They’ve got enough fat to stay juicy under the high heat, and their flat surface area is perfect for sauce adhesion. I cut them into bite-sized pieces – about 1.5-inch chunks – which gives you maximum surface area for both crisping and sauce coating.
Chicken breast works too, but you have to be more careful about not overcooking it. If you go the breast route, cut it into slightly smaller pieces and reduce the cooking time by 2-3 minutes. The key is ensuring all pieces are roughly the same size so they cook evenly.
I’ve tried this with bone-in pieces, but honestly, it’s not worth the hassle. The sauce doesn’t coat as well, and you can’t get those perfect bite-sized pieces that make this dish so addictive. Stick with boneless for the best results.
How to Prep Chicken for Honey Garlic Success
The prep work for this recipe is a little different from my other air fryer chicken dishes. You still want to pat the chicken dry and bring it to room temperature, but then comes the light cornstarch coating – this is what creates that extra-crispy texture that holds up under the sauce.
I use about two tablespoons of cornstarch for a pound of chicken, just tossing everything together in a bowl until each piece has a light, even coating. Don’t go heavy-handed here – you want just enough to create texture, not enough to make it gummy.
The seasoning at this stage is minimal – just salt and pepper. The honey garlic sauce is where all the flavor magic happens, so you don’t want to compete with it during the initial cooking phase.
How to Make Honey Garlic Air Fryer Chicken
Air Fryer Setup for Honey Garlic Chicken
Preheat your air fryer to 400°F – this recipe needs that high heat to get the initial crisp and then caramelize the sauce properly. My Cosori takes about 3 minutes to reach temperature, while the Ninja Foodi needs closer to 5.
Line your basket with parchment paper, but make sure it has holes or perforations. The sauce can get a little messy, and cleanup is much easier with a liner. Just don’t use solid parchment – you need air circulation for this to work properly.
Arrange the cornstarch-coated chicken pieces in a single layer with space between each piece. This is crucial – overcrowding will prevent proper crisping, and when you add the sauce later, pieces that are touching will stick together in a gummy mess.
Honey Garlic Sauce That Actually Sticks
While the chicken cooks, you’ll make the sauce. In a small bowl, whisk together honey, soy sauce, minced garlic, rice vinegar, and a pinch of red pepper flakes. The ratio I’ve perfected is 3 tablespoons honey, 2 tablespoons soy sauce, 3 cloves of minced garlic, 1 tablespoon rice vinegar, and just a tiny pinch of red pepper flakes.
The consistency should be pourable but not watery – think maple syrup thickness. If it’s too thick, add a tiny bit more vinegar. Too thin? Add a little more honey. This sauce keeps in the fridge for up to a week, so I often make double batches.
Here’s the crucial part: don’t add the sauce until the chicken has cooked for at least 12 minutes and is golden brown. Adding it too early will prevent proper crisping and result in soggy, gummy chicken.
Perfect Timing for Sauce Application
Cook the chicken for 12 minutes at 400°F, giving the basket a shake halfway through. The pieces should be golden brown and crispy when you remove them. If they’re not quite there yet, give them another 2-3 minutes.
Now comes the magic moment: drizzle the honey garlic sauce over the crispy chicken, then use tongs to toss everything together until each piece is evenly coated. The hot chicken will immediately start caramelizing the sauce.
Put everything back in the air fryer for 3-4 minutes at 400°F. You’ll hear some sizzling – that’s good! The sauce is caramelizing and creating that perfect sticky-crispy coating. Give the basket one final shake after 2 minutes to ensure even coating.

Best Seasonings and Sauce Variations
The basic honey garlic sauce is perfection as-is, but I’ve developed some variations that are incredible. For Korean-inspired honey garlic, I add a tablespoon of gochujang to the sauce mixture. It gives you this amazing sweet-spicy-umami combination that Tyler absolutely devours.
For a more Asian-restaurant style, I add a teaspoon of sesame oil and some sesame seeds during the final minute of cooking. The sesame oil adds this nutty depth, while the seeds give a nice textural contrast.
Buffalo honey garlic is Emma’s current obsession – I replace half the honey with buffalo sauce and add extra garlic. It’s this perfect balance of sweet, spicy, and tangy that works incredibly well with the air fryer method.
Sometimes I’ll add fresh ginger to the sauce – about a teaspoon of minced fresh ginger along with the garlic. It adds this bright, zingy note that cuts through the sweetness beautifully.
Serving Ideas for Honey Garlic Chicken
This honey garlic chicken is incredibly versatile. For weeknight dinners, I serve it over steamed rice with some air fryer broccoli on the side. The sauce from the chicken flavors the rice, and it becomes this complete, satisfying meal.
As an appetizer, I’ll arrange the pieces on a platter with toothpicks and serve them alongside some cooling cucumber slices. The contrast between the sticky, warm chicken and cool, crisp cucumber is perfect for parties.
For meal prep, this chicken works beautifully in grain bowls. I’ll do brown rice, steamed vegetables, and the honey garlic chicken with maybe some sliced avocado and sesame seeds. It keeps well in the fridge and actually tastes great cold.
Jake’s favorite way to eat leftovers is in a wrap with some lettuce, shredded carrots, and a squeeze of lime. The honey garlic flavor works surprisingly well with fresh, crunchy vegetables.
Storage and Reheating Tips
Leftover honey garlic chicken keeps in the refrigerator for up to 4 days, but the texture is definitely best within the first 48 hours. The sauce can make the coating a little less crispy over time, but it’s still delicious.
For reheating, I’ve found that 2-3 minutes in the air fryer at 350°F brings back most of that crispy texture. Don’t use the microwave – it’ll turn everything soggy and sad. If you don’t have access to an air fryer for reheating, a regular oven at 400°F for 5-6 minutes works decently.
The sauce tends to thicken up in the fridge, which actually makes the leftovers easier to eat with a fork. Sometimes I prefer the day-two texture because the flavors have had time to really meld together.
Honey Garlic Air Fryer Chicken Variations
Once you master the basic technique, this recipe becomes a template for so many variations. Teriyaki chicken uses the same method but with teriyaki sauce instead of honey garlic. Orange chicken works beautifully too – just swap in orange juice concentrate and orange zest.
For a healthier version, I sometimes use a sugar-free honey substitute and coconut aminos instead of soy sauce. It’s not exactly the same, but it’s pretty close and works great for anyone watching their sugar intake.
Spicy honey garlic is incredible – just add sriracha or your favorite hot sauce to the basic sauce mixture. Start with a teaspoon and adjust from there. The sweet-heat combination is absolutely addictive.
I’ve also done a honey mustard version using Dijon mustard in place of some of the soy sauce. It’s more tangy than the traditional version but equally delicious, especially served with some roasted vegetables.
Conclusion
This honey garlic air fryer chicken has honestly ruined takeout for us – in the best possible way. It’s faster than delivery, tastes better than restaurant versions, and I know exactly what’s going into it. Plus, there’s something deeply satisfying about watching that sauce caramelize and stick to perfectly crispy chicken.
The technique translates to so many other sauce combinations that it’s become one of my most-used air fryer methods. Once you nail the timing of when to add the sauce, you’ll be amazed at how restaurant-quality you can make simple chicken at home.
Honey Garlic Air Fryer Chicken FAQ
Can I use chicken breast instead of thighs?
Absolutely! Cut the breast into slightly smaller pieces and reduce cooking time by 2-3 minutes before adding sauce. Breast meat cooks faster and can dry out more easily, so watch it carefully.
What if my sauce is too thick or thin?
Adjust with small amounts of rice vinegar (to thin) or honey (to thicken). The ideal consistency is like maple syrup – pourable but not watery. Remember, it will thicken slightly as it cools.
Can I make the sauce ahead of time?
Yes! The sauce keeps in the refrigerator for up to a week. Just whisk it again before using, as the ingredients may separate slightly. I often make double batches for quick weeknight meals.
Why isn’t my chicken staying crispy after adding sauce?
Make sure the chicken is fully cooked and golden before adding sauce, and don’t skip the final 3-4 minutes in the air fryer after saucing. This step caramelizes the sauce and maintains crispiness.
Can I double this recipe?
You can, but you’ll need to cook in batches. Don’t overcrowd the air fryer basket, as this prevents proper crisping. It’s better to do two properly cooked batches than one overcrowded one.
What’s the best honey to use?
Any honey works, but I prefer a mild variety like clover honey so it doesn’t overpower the garlic. Avoid very dark or strong-flavored honeys like buckwheat, as they can dominate the sauce.


1 thought on “Honey Garlic Air Fryer Chicken That’s Better Than Your Favorite Takeout”